Author Archives: Luis Rocha

Indicators of Compromise (IOC’s)

indicators
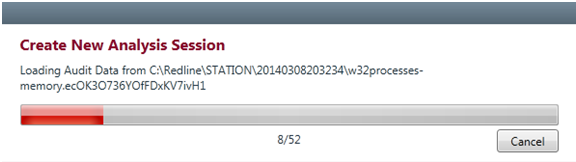
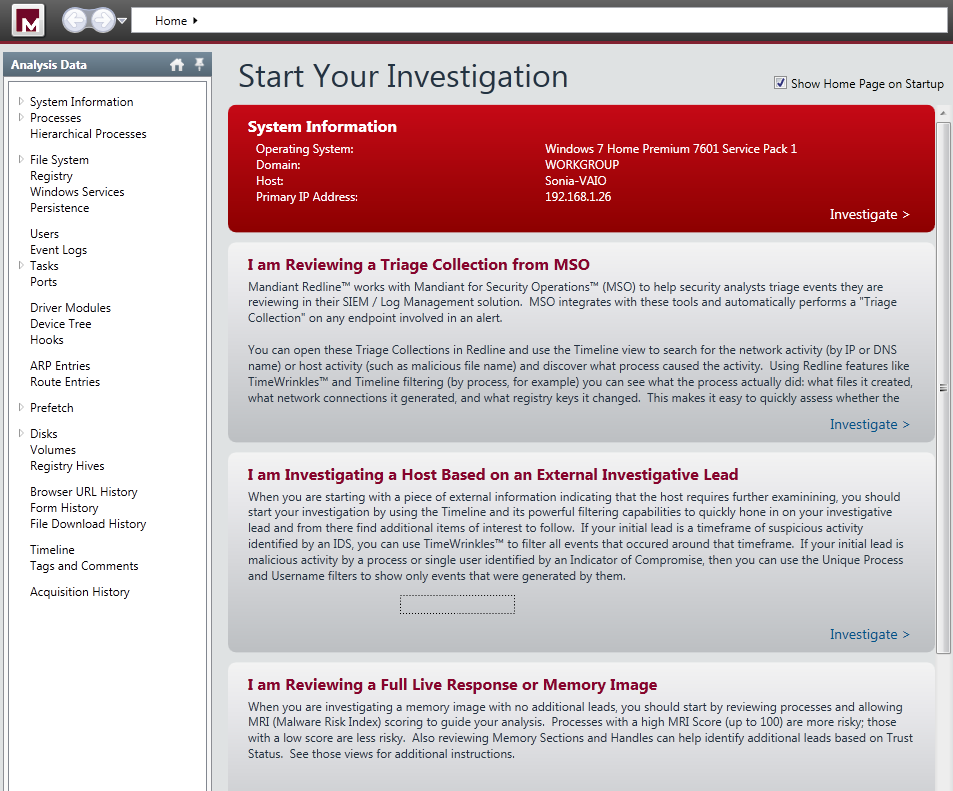
20 days have passed since my last post about how to do a live memory acquisition of a windows system for malware hunting and forensics purposes. In that article, I  explained the details on how to create a collector, collect the data, and import the data into Mandiant Redline. The second part will be about the investigation and how to look for threats using indicators of compromise (IOC). However, before part II , I would like to give a brief introduction to IOCs.

For those who never heard about indicators of compromise they are pieces of information that can be used to search and identify compromised systems . These pieces of information have been around since ages but the security industry is now using them in a more structural and consistent fashion . All types of companies are moving from the traditional way of handling security incidents. Wait for an alert to come in and then respond to it. The novel approach is to take proactive steps by hunting evil in order to defend their networks. In this new strategy the IOCs have a key role. When someone compromises a systems they leave evidence behind.  That evidence, artifact or remnant piece of information left by an intrusion can be used to identify the threat or the malicious actor. Examples of IOCs are IP addresses, domain names, URLs, email addresses, file hashes, HTTP user agents, registry keys, a service configuration change, a file is deleted, etc. With this information one could sweep the network/endpoints and look for indicators that the system might have been compromised. For more background about it you can read Lenny Zeltzer summary. Will Gragido from RSA explained it well in is 3 parts blog here, here and here. Mandiant also has this and this nice articles about it.

Now, different frameworks and taxonomy exist in the security industry in order to deal with IOCs. These frameworks are important in order to share information in a consistent, scalable, automated and repeatable way across different organizations. One initiative is the OpenIOC sponsored by Mandiant. OpenIOC uses an extensible XML schema that allows to describe the technical characteristics of an intrusion or malicious actor.  Another initiative is from the IETF Working Group who defined two standards. One for describing the observables of security incidents which is  The Incident Object Description Exchange Format (IODDEF) described in RFC 5070. The other is the Real-time Inter-network Defense (RID) described in RFC 6545 and is used to transport and exchange the IODEF  information. Other initiative is from MITRE that developed CyboX, STIX, and TAXII , all free for the community and with high granularity. In order to read more about these initiatives Chris Harrington from EMC Critical Incident Response Center has a nice presentation about it. Other resource is a very interesting study made last October by ENISA named Detect, SHARE, Protect – Solutions for Improving Threat Data Exchange among CERTs.

That being said, we can now start using these IOCs to defend our networks. One way is by gathering information from the investigations made by security researches or vendors with actionable intelligence. For example back in September 2013 the campaign “ICEFOG : A tale of cloak and three daggers” was released by Kaspersky. This report contains great technical details and significant amount of actionable information. Another example was the  NetTraveler campaign which has been disclosed in June 2013. This report describes a piece of malware was used to successfully compromise more than 350 high-profile victims across 40 countries. The report is well written and contained great technical details. On chapter 5 it presents a huge list of IOCs to help detect and eradicate this threat. Following that, Will Gibb from Mandiant converted the information from the NetTraveler report into the OpenIOC format.  With this IOCs one could import it into  Redline. Of course this was an effort made by a vendor to incentive the usage of his format but others could use any other standard or framework to collect this observable’s and turn them into actionable information.

On my next post I will show how to import IOCs in OpenIOC format into Redline and find Evil on my wife’s laptop!

Tagged , , , , ,

Redline – Finding Evil on my Wife’s Laptop – Part I

[Editor’s Note: My wife has been complaining about her laptop running slow for quite some time. I am not sure if the system is really slow due to its specifications or the number of pictures it has : ) . But then I thought – This is a good opportunity to try Redline from Mandiant,  wear my Sherlock Holmes hat and maybe I find something interesting -.  Below are the steps taken to do a live memory acquisition using Redline  and its comprehensive agent collector for in depth malware hunting! ~Luis ]

Following the identification phase of the incident handling process,  where among others you have identified malicious acts or deviations from the normal operation. It comes the containment phase.  This is the third stage of responding to computer incidents.  Trough this step, one of the things we do  is a initial analysis of the compromised system by taking a low profile approach. Is also where we capture the relevant data from the system – in forensics terms this step is where you  preserve digital evidence.. Normally we would do a forensics image of the affected system for further analysis. One thing that should be part of our forensics image is the file system (disk imaging) and a memory dump (volatile data). One of tools that can help incident handlers looking at the memory/volatile data for further forensics analysis is The Volatility Framework and associated plug-ins. Another powerful one is Memoryze from Mandiant. Memoryze version 3.0 was released last July and it supports a variety of operating systems.  From the time Memoryze was released, Audit Viewer was the tool of choice to interpret and visualize its output. These two tools have evolved and are blended in Mandiant Redline. Last December, Redline 1.11 was released with support from Windows 8 and 2012.  “Redline is a free utility that accelerates the process of triaging hosts suspected of being compromised or infected while supporting in-depth live memory analysis.“. In addition this tool can also help you finding malware trough the use if Indicators of Compromise (IOC) which is a very powerful method and can be used to find threats at host or network level.

To execute Redline and to do the live system memory acquisition, the methodology used is the one suggested in the user guide. It’s very straight forward and consists on the following 6 steps:redline-steps

We went through the user guide and according to Mandiant you should install Redline in a pristine system. Mandiant recommends this approach due to inability to assure that your system is secure and free from malware. This way you would ensure the results and the IOC database is not compromised. Further, you don’t create the risk to overwrite or destruct evidence from disk or memory. Mandiant even recommends to run the Redline in a system fully disconnected from the network. That being said, I fire up my VMware workstation and installed a new Windows 7 32bit system.

We didn’t fully disconnect the system from the network. We did position it in the Bridge VMnet in order to have access to our home network and be able to access internet to download stuff. We downloaded the tool and ran it.  First thing it will say is that  Redline requires Microsoft .NET 4. If is not installed it will redirect to the Microsoft .NET installation web page. The installation is quick and simple. Just follow the user guide. When the installation is finished you will be presented a nice web interface like shown below.

mandiant-redline

After glimpsing trough the user guide and getting acquainted, Redline has ways that it calls Collectors to acquire data from the suspicious system. The Standard Collector, Comprehensive Collector and IOC Search collector and the 3 methods supported. We decided to run the Comprehensive Collector to gather the most data out of the system for a full in depth analysis. Each one of the methods is well explained in the user guide.

redline-collectdata

In addition, we further selected to acquire a memory image which is not selected by default. We left the remaining options regarding memory, disk, system and network untouched. We selected a folder and saved the collector settings.

redline-collectorscript

We then copied the collector folder into a USB stick.  Then we went with the USB stick into my wife computer and launched the “RunRedlineAudit.bat” script. This script will go through the Collector settings we defined and will acquire all the data and save the results into a folder with the computer hostname name. It took around 3 hours to acquire all the data – the system had 4 GB of Ram and a slow disk –

redline-agent

We then moved the USB stick back into the Redline system and used the Analyze Data option from the main menu. Then selected From Collector which allows you to load the data into Redline.

redline-analyzedata

We selected the folder location of the data and at this stage you can also compare the data with IOC artifacts of your choice. At this stage we will skip the IOCs.

redline-startsession

Then click next and you select the name for saving your analysis session. It then starts loading all the data and creating the analysis session.

redline-loadingdata

After finishing loading the data we are presented with a nice “Start your Investigation” page. This is the home page of your analysis and it contains several steps suggested by the tool to assist in your investigation:

  • I am Reviewing a Triage collection from MSO.
  •  I am Investigating a Host Based on a External Investigative Lead.
  • I am Reviewing a Full Live Response or Memory Image.
  •  I am Reviewing Web History Data.
  •  I Want to search my data with a set of Indicators of Compromise.

redline-investigationsteps

We will go trough the Investigation Steps in another post. But, It is impressive to see the how easily you can capture a enormous amount of information in an automated fashion. The tool capture the entire file-system structure, the network state, the system memory, the contents of the registry, processes information, event logs, web browser history, service information, etc. The interface is also well designed and provides an interesting workflow (collect, import, investigate) that presents suggested investigative steps that you should take in order to examine the data and look for signs of Evil.  

As you could see this part is the boring part  (collecting and importing). The interesting part (investigation)  is to start to get familiar with these live system captures collected from a variety of good an evil systems. Which then allows you to get a sense of what to look and start your investigations and look for threats. This will require practice. Practice these kind of skills, share your experiences, get feedback, repeat the practice, and improve until you are satisfied with your performance.

Tagged , , ,

Reverse-Engineering and Malware Analysis

malwareLast year I had the chance to go to SANS Orlando 2013 in Orlando, Florida – thank you Wes! – which is one of the yearly’s biggest SANS conferences only outpaced in size by SANS FIRE in Baltimore, Maryland.  I went there to take the 5 days course – FOR 610 Reverse-Engineering Malware: Malware Analysis Tools and Techniques – with Lenny Zeltser. Apart of the course the main choice was due to the instructor. Lenny is a brilliant fellow and top rated SANS instructed. Awesome writer and fantastic lecturer.

I was very enthusiastic about taking out the most of it. One reason was  because I had read the Malware Fighting  Malicious Code book from Ed Skoudis where Lenny wrote chapter 2 and 4.  This book is 10 years and it’s still a classic, a historical object and definitely a must read to someone who is part of the security community. Other reason was that l wanted to get the skills to be capable of securely analyze, debug, and disassemble malicious programs in order to translate this capability into actionable threat intelligence.

On the first day of the training we got introduced to 2 approaches to examine malicious programs. Behavior analysis and static/code analysis. To perform this we started by setting up a controlled and isolated environment. A simple and inexpensive malware analysis lab running on VMware. Using this lab we used a set of free tools that allowed us to determine what the malicious program does and how it interacted with the file system, network, registry and memory. We also got introduced to REMnux . A lightweight Linux distribution for assisting malware analysts with reverse-engineering malicious software. The distribution is based on Ubuntu and is maintained by Lenny Zeltser.  Using a set of Windows tools, the REMnux distro plus a variety techniques we  got a better understanding how we could analyze malware and determine its capabilities.  Then we got deeper in order to make a detailed analysis of the malware by using reverse engineering tools and different methods. By using techniques to find strings in the executable, run a disassembler (IDA Pro),  load the executable into a debugger (OllyDbg) and execute it and look at the API calls being made we got a glimpse in the world of code analysis. After the lab was set and we got an understanding of the processes we will follow the fun started! With several hand-on labs and different specimens we observed what the malware does and we could document the findings and translate them into indicators of compromise and actionable intelligence that can be used to proactively detect and monitor threats.

Day two started with additional malware analysis approaches. We started to get introduced into packed executable’s and what patching means. Also we unpacked malicious executables using simple packing techniques. Here is where we began the journey on x86 Intel assembly. On the second half of day two we covered browser malware and flash based malware and how to use REMnux to use behaviors and code analysis techniques to analyze web malware. It was impressive to see the amount of ingenious techniques enforced by the bad guys to deliver malicious stuff.

Day three is a deep dive into malicious code analysis. Its starts with core reversing engineering concepts and you spend the rest of the day playing with malicious code at the assembly level. It’s the all day looking at a dissasembler and a debugger. Throughout the material and the exercises you get more and more exposed to x86 assembly stuff. We manage to use the debugger to control malicious program execution (step in, over, breakpoints) and monitor or change its state (registry and memory).   On this day we also covered user mode rootkits, key loggers, sniffers, DLL injection and downloader’s – great stuff!

Day four, even after 10 hours sleep I doubt I had enough processing power on my neurons to absorb all Lenny had to say. As complementary strategy I gave a lot of use to my pencil and wrote as much notes as possible in my courseware material. During the first half of the day we were shown the techniques that the malware writes use to protect their programs. Packing was one. But more complex techniques such as anti-disassembly, anti-debugging and anti-VMware and others were demonstrated. It’s an extraordinary arms race between good and evil. A huge amount of hands on exercises were made so we could reinforce all these concepts and techniques. Was also amazing to see Lenny describing how different malware specimens use mazes of code and junk code to frustrates the analyst and mislead him. By enforcing this techniques, in case the analyst does not have enough resources (time/money) he will soon stop doing his analysis and move on to something else – Evil will win – an interesting trade-off. Apart of the techniques we were taught different techniques to bypass those malware defenses. One example was to infect a system with a piece of malware that was packed/obfuscated. When execute, the malware  loaded its unpacked code into memory which allowed us to examine it. By staying resident in memory because in the file system it was encrypted we used techniques do dump it from memory. To do this we used Chimprec to extract the process from memory and then rebuilding its  PE header import table in order to be executed. Other technique was the usage of a debugger to patch an executable to avoid anti-debugging mechanism. Other tools like LordPE and OllyDump are also used. On the second half of the day, shellcode analysis and Web malware anti-deobfuscation techniques were described and practiced.

Finally on day 5 we spent the first half of the day learning the techniques and tools for analyzing malicious Microsoft Office (Word, Excel, PowerPoint) and Adobe PDF documents. The second half of the day is spent on memory analysis forensics with the help of Volatility Framework and associated plug-ins. The course ends with explanation of the different techniques used by root kit infections and its deceptive techniques and how you could use memory and code analysis to determine and un-hide their capabilities.

The course is extremely technical and deep and very hands-on. I was overwhelmed with the amount of information. After day 3 I was feeling like I was drinking from the fire hose. The course is part of the SANS digital forensics and Incident response curriculum. It is very well structured and the sequential steps it follows are very well thought out.

This particular security field is a very interesting one, it will continue to evolve and it is challenging. Also as the security industry continues to progress from a reactive approach to a more proactive one, the malware analyst type of skills will have an increased demand. More and more companies are funding their own threat intelligence operations with this kind of capability in-house.

If you are an incident handler, sysadmin, researcher or simple want to be the next digital Sherlock Holmes you may also want to look into the Malware Analyst’s Cookbook and DVD: Tools and Techniques for Fighting Malicious Code book and the Practical Malware Analysis. Other relevant and free resources are the Dr. FU’s Security blog on Malware analysis tutorials. Thet Binary Auditing site which contains free IDA Pro training material.  Finally, the malware analysis track  in the Open Security Training site is awesome. It contains several training videos and material for free.

Tagged , , , ,

Could we ask John Connor to bring his Atari and bypass this?

Automatic Teller Machines (ATM) are devices that provide the customers of a financial institution with the ability to perform financial transactions [1].  They are available everywhere and often use well known operating systems and off-the-shelf hardware. During last Christmas while on vacations and walking through the beautiful city of Lisbon I came across the ATM posted in the picture.Winnt-ATM

An ATM running Windows NT operating system! – By this time the ATMs should be running Windows XP embedded not to say Windows 7 embedded!

Without a doubt the most common ATM attacks involve using card skimmers. An excellent resource to read about card skimmers is the series that Brian Krebs putted together on “all about skimmers”. It’s definitely an opening eye and excellent to raise awareness. Other attacks techniques are card trapping, pin cracking, phishing and malicious software [2]. However when I saw this ATM I automatically remembered Barnaby Jack and his DefCon presentation Jackpotting Automated Teller Machines.  It’s like in Terminator 2, where John Connor uses its Atari to bypass security on an ATM with a ribbon cable connecting the parallel interface to a magnetic stripe card. Fiction apart these kinds of attacks are very real. For example, this one that was seen in Mexico or the Troj/Skimer-A with a in-depth analysis by XyliBox. Another interesting report is this one from Trustwave which shows  a piece of malware that targets ATMs with Windows XP operating system. Diebold ATM Security Communication and Support Center as good information about all kind of attacks like the one seen in Russia where an insider, would install the malicious code on several ATMs running Windows XP embedded. Then with a special activation card that would allowed complete control of the ATM.

Would you withdraw money from an ATM  running Windows NT?

[1-2] Mubarak Al-Mutairi; Lawan Mohammed ; IGI Global ; Cases on ICT Utilization, Practice and Solutions.

Tagged

SMTP Gateway placement

smtpWhere and how should I place my SMTP gateway in the security infrastructure?

I saw this question going around in one of the mailing list I am subscribed and would like to share some thoughts about it. This is old school stuff since our IT security perimeters are being diluted from a well-defined structure to unclear points taken by the new mobility, apps and cloud ecosystem. Every day new threats are exploiting the border-less network and mobile platforms are a prime target. However, companies still need the old and traditional security perimeter and its always good to refresh the old network security infrastructure architecture and concepts.In addition SMTP is a popular vehicle of malware infection and distribution.

To answer this question, there is no right or wrong answer since it all depends on your organization size and risk appetite. Designing a specific network security solution for a business of any size its a engineering and creative task. However, there any plenty of industry guidelines and best practices that you should follow in order to have a layered security approach with defense in depth using redundant and overlapping security controls that mitigates or reduces the risk. Lets review 3 technical suggestions for deploying your perimeter SMTP gateway.

Single-arm deployment : You can have a single-arm configuration in your perimeter firewall. This is a simple solution and makes routing and switching easy. In this DMZ you will position your SMTP appliance.  This appliance normally will be from one of the many SMTP GW products outhere like TrendMicro IMSS, Ironport ESA, eSafe Gateway, etc. This SMTP appliance will normally do Anti-Virus and Anti-Spam (both ingress and egress). With this solution you will have a single physical network interface. You will run all the services on this interface. This means the SMTP traffic to the internet and to the internal MTA such as Microsoft Exchange. You will also run all the management protocols like HTTPS, SSH for accessing the management interface, SNMP for monitoring, Syslog for logging and others like LDAP. This solution is very simple with almost no complexity and low maintenance costs. It wont need any special routing and switching and will be easy to troubleshoot. However, your security posture wont be the best and you wont have segregation of data, which means management and production/data traffic will run on the same interface. Plus you need to consider that running all these protocols on one interface it might consume significant amount of bandwidth from the physical interface.

Two-arm deployment : With this configuration you will have one interface connected to the outside, typically the external firewall and one interface connected to the inside, typically the internal firewall – Its also possible to create a two-arm solution with a single firewall – The appliance needs to have 2 physical interfaces each one in different subnets. Normally you call the external interface the frontend and the internal interface the backend. Management traffic will only be accessible trough the backend interface.

Three-arm deployment : If you must have management traffic separated from data/production traffic this is the best solution. Of course your security infrastructure framework should already support this kind of model in order to have proper routing and switching. This setup will require 3 physical interfaces each one on different subnets. Normally the management interface will be in the same subnet as other security infrastructure appliances management interfaces. With this solution you will have great control and flexibility over the data and management traffic which means better security. At the expense of routing and switching complexity you will gain great flexibility and control over the traffic . This solution is normally harder to troubleshoot.

Those three models are the ones typically seen in the enterprises from small, medium to large corporations.

In addition to the positioning you should also have defense in depth for the SMTP protocol. This means you should consider different layers of AV/Anti-Spam inspection. Normally, you will have inspection at gateway level, then at the MTA level and finally at the client level. You can further complement these levels with a layer 2 inspection gateway before or after your SMTP gateway. Do not forget to have IDS doing SMTP inspection trough the traffic path as part of robust network defense solution. Furthermore, you also need to address DNS concerns for SMTP to work properly. Apart of MX and A records for SMTP deliver you might need PTRs, SPF and others properly registered.

PS: If the time permits I will add some diagrams to illustrate each one of the deployment models.

Tagged , , ,

Bitcoin – My story

Image retrieved from Bitcoin.org

I thought it was worth to share with you my experiences with Bitcoin, so here it goes!

I’m always keen on learning new things, similar to an eternal student. I like to read and search about new stuff and how it works, especially in the IT security realm. While I do this and, because I have more interests than time, I normally keep notes about something I have seen or have read to further look into it. So, in December 2012 I was reading a new technical paper released by Sophos named Zero Access Botnet – Essentially the details about a botnet for massive financial gain. It was quite interesting how Evil was getting ways to monetize trough fraud and having a economical gain trough Bitcoin mining. It was the first time I have read about Bitcoin. It was novel and creative. I wrote it down on my notebook as something that I would like to further research. Time has passed. In January 2013, while I was doing a research about botnets and how they evolve and emerge, I wrote this article – Step-by-Step Bot Infection process exploiting bad password -. At the time I was writing I came across  a great amount of channels dedicated to mining and activity related to bitcoins in different IRC networks. Here it started to raise my interest. It was out of the ordinary and motivating.

But once again other priorities came across and only on the 10th of April 2013 when I was watching CNN that I saw this crazy commentary about bitcoins. They were talking and showing that the bitcoin price had went mad and 1 Bitcoin was valuing more than 250$. It followed by a crash in the next days to 77$ and I thought, OH MY GOD! I definitely had to educate myself more about this. It was going to be a game changer.

From this date onward I started to read more and started to take it serious. I made a deep dive and among others I read the FAQ maintained by bitcoin.org as well as the original paper – Bitcoin: A Peer-to-Peer Electronic Cash System – by Satoshi Nakamoto, who remains anonymous in an intriguing mystery. Then I started to get more familiar with this disruptive and innovative technology that may have an positive impact on payment systems. End result, I figure out that I needed a electronic wallet.

I started registering and creating an online wallet from Blockchain. Then, in order to buy Bitcoins, I needed to use an exchange. So I opened an account on MtGox – the reliable exchange at that time –  I sent them a scan of my ID, proof of residence and after 1 long week I got verified – the queues for verification were enormous due to the April boom-. After having my account verified, I started to buy and sell Bitcoins. I could also deposit and withdraw fiat money. In the meanwhile I took a great degree of risk and wired some money from my bank account to MtGox account in Hong Kong. It took me 4 days until the money was available in the exchange for trading. After that I bought a couple of Bitcoins and started to trade them and in the same time was learning myself more about the concept of mining and the whole bitcoin ecosystem.  I powered up all my computers at home – including my wife’s laptop – and begun mining with them using CPU. Very soon I realized that was worthless due to the difficulty change and electricity costs. I got further and bought the most powerful GPU available on the market for mining which was a ATI Club 3D Dual 7990. It was hashing at 1.8Gh/hashes per second and making a lot of noise. For mining I had to point the client mining software (cgminer) to the Slush pool which was very reliable and trustworthy. I used the GPU for more or less 3 months and then it also became obsolete. In parallel with some price crashes, DDOS to the exchanges and pools plus all the exciting ride I never got to make the money I invested in the GPUs. However, I believe that the bitcoin protocol can have an impact in the future even if it’s not the “bitcoin” we are definitely going to have electronic cash protocol. Following this, I bought a specific machine to mine Bitcoins using ASICs from KncMiner which arrived last October and was worth it. During the summer/autumn 2013 It has been a hell of a drive, extremely interesting and rewarding.

At the moment I am more aware how the system works from a user perspective for the good and the bad. More recently I also read this good explanation on how the protocol works. Noteworthy, are these 3 great videos on C-Span library that were recorded back in November 2013 when different key people in the US testified on digital currencies with remarkable questions and answers.

Furthermore, to follow the price volatility and go into trading mode I use Bitcoinitity charts . At the moment to be part of the mining community and  to be worth of you need to buy specialized hardware e.g, from KncMiner, a client miner like cgminer and then mine in a pool like Slush.

For news and other related matters I follow some threads in Bitcointalk forum, Reddit.com/Bitcoin and Coindesk.

Bottom line, to start create an online wallet, register yourself and get verified with a exchange such as Bitstamp. Wire some money – the one you afford to lose – and buy some Bitcoins. Store them on the online wallet or buy some stuff. Keep in mind that if you store money or Bitcoins in a exchange or on a online wallet you accept the risk of losing it due to a breach like many others that have occurred in the past or being seized by a government since Bitcoin is still an experiment without regulation backing it up. If it is a significant amount of Bitcoins you can store them in a offline wallet or even a paper wallet. After you are familiar with the basics you can move up to trading or mining 24/7.

Have fun and enjoy the experience!

Tagged

CVE November Awareness Bulletin

[Following previous month’s CVE Awareness Bulletin below the November release]

The CVE November Awareness Bulletin is an initiative that aims to provide further intelligence and analysis concerning the last vulnerabilities published by the National Institute of Standards and Technology (NIST), National Vulnerability Database (NVD) and the IDS vendors’ coverage for these vulnerabilities.

Common Vulnerabilities and Exposures (CVE) is a public list of common names made available by MITRE Corporation for vulnerabilities and exposures that are publicly known.

This is the most popular list of vulnerabilities and is used as a reference across the whole security industry. It should not be considered absolute but due to the nature of its mission and the current sponsors – Department of Homeland Security (DHS), National Cybersecurity and Communications Integration Center (NCCIC) – it is widely adopted across the industry.

Based on this public information I decided to take a look at what has been released during the month of November. There were 389 vulnerabilities published where 56 were issued with a Common Vulnerability Scoring System (CVSS) score of 8 or higher – CVSS provides a standardized method for rating vulnerabilities using a scoring system based on their different properties from 1 to 10. From these security vulnerabilities, I compared the last signature updates available from products that have a significant share of the market i.e., Checkpoint, Tipping point, SourceFire, Juniper, Cisco and Palo Alto. The result is that SourceFire has the best coverage with 23%. TippingPoint, Checkpoint and Juniper rank second with 16%. Cisco ranked third with 12% followed by Palo Alto with 0%

The following graph illustrates the mapping between the CVEs published in November with a CVSS equal or higher than 8 by vulnerability type and the vendor coverage:

cve-november

In addition to looking at all the vulnerabilities released, it is also essential to look into detail for specific coverage like Microsoft products vulnerabilities. On the 12th of November the Microsoft Security Bulletin (a.k.a Patch Tuesday) announced 25 vulnerabilities. From these 12 have a CVSS score equal or higher than 8. From these the vendor coverage is shown in the following table:

msbulletin-november

The vendors analyzed have provided signatures on the same date (12 of November) or few days later. The mentioned signatures and patches should be applied as soon as possible but you should also fully evaluate them (when possible) before applying it production systems.

In addition to that, following signature update deployment, you should always check which signatures have been enabled by default.  Plus you should be evaluating what is the impact in your environment for the CVEs that don’t have coverage.

Bottom line, the vendors that were analyzed have a quick response but the coverage should be broader. September we saw 56 vulnerabilities with a CVSS higher than 8 but only 23% of them have coverage in the best case (SourceFire). This means 77% of the published vulnerabilities don’t have coverage. Regarding the vendor response to the Microsoft Security Bulletin Summary for November 2013, the coverage is better and goes up to 100% in the best case (SourceFire). Interesting to note that some of these vulnerabilities are related to software that don’t have significant share in the market. Even if the vendors would have 100% coverage they would not apply to all environments. Furthermore, the likelihood of these vulnerabilities to be successful exploited should also be considered since some of them could be very hard to pull off. So it’s key that you know your infrastructure, your assets and mainly where are your business crown jewels. Then you should be able to help them better protect your intellectual property and determine will be the impact if your intellectual property gets disclosed, altered or destroyed.

Tagged , , , , ,