Tag Archives: Incident Response

FireEye Endpoint Security (HX) – Supplementary Tools

Today I am going to write a few notes about tools that should be part of your toolkit in case you use FireEye Endpoint Security product a.k.a. as HX. If you don’t use FireEye HX, this post likely has no interest for you.

I tend to use HX when performing large scale Enterprise Forensics and Incident Response. I also tend to see HX or other EDR solutions on organizations with mature security operations that use such technology to increase endpoint visibility and improve their capabilities to detect and respond to threats on the endpoints. HX is very powerful,  feature rich but like many EDR products it tends to be designed for more seasoned incident responders with specialized skill set. HX can be used in the realm of protection, detection, and response. Today’s notes are primarily focused on two things: Increase awareness about tools that will help augment HX capability to detect attacks; Increase awareness about tools that will help the analyst ability to work with the results. Goal is to improve threat detection and ability to analyze the results therefore increase the effectiveness of your product and maximize the outcome of your investigations.

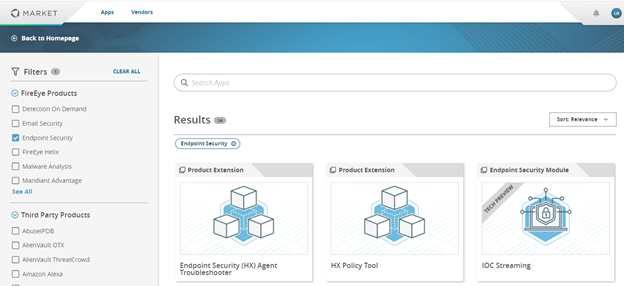
FireEye makes available a website named fireeye.market where one can download apps that extend the functionality of existing products. If you are a FireEye customer you likely have seen this before. For this post I’m looking at the Endpoint Security apps that might extend the functionality of the HX or enhance the analyst ability to perform the work faster/better.  On the FireEye Market website there are a few things that are freeware and can be downloaded without subscription. Others may require a subscription. One of the main freeware tools is the IOC Editor. Let’s briefly go over some of the things that will be useful.

Indicators of Compromise (IOC) Editor is a free tool for Windows that provides an interface for managing data and manipulating the logical structures of IOCs. IOCs are XML documents that help incident responders capture diverse information about threats, including attributes of malicious files, characteristics of registry changes, artifacts in memory, etc.  There are two versions of IOC editor in the website. We want the IOC 1.1 editor version 3.2. The installation file Mandiant IOCe.msi can be downloaded from here  https://fireeye.market/apps/211404 . The archive is IOCe-3.2.0-Signed.msi.zip (3EE56F400B4D8F7E53858359EDA9487C). This version brings updated IOC terms that allow us to create IOCs for HX real-time alerting and for searching the contents of the HX event buffer (ring buffer). Note that Redline does not support IOC 1.1. If you are a developer or interested in the details IOC 1.1 specification you can look here https://github.com/mandiant/OpenIOC_1.1. This schema is what Mandiant services uses internally to extend functionality of IOC Editor and support new and extended terms. The IOC editor contains two main set of terms: On one hand you have the terms that can be used to search for historical artefacts (Sweep) and on the other hand you have the terms that can be used to search event buffer (Real-Time) or generate real time alerts. All terms are created with a set of conditions and logic needed to describe and codify the forensic artefacts.

OpenIOC2HXIOC

When you use IOC editor to create, edit, maintain your Real-Time IOCs you need to upload them to HX either for testing or to be on released on production. One way to accomplish this is to use the Python script that takes IOCs as input and uploads them into HX to be used on Real Time alerting. This script can be downloaded from https://fireeye.market/apps/213060. You will need Python and a HX user account with API rights because the script takes advantage of the HX API to perform the work.

HXTOOL

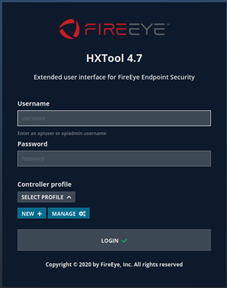
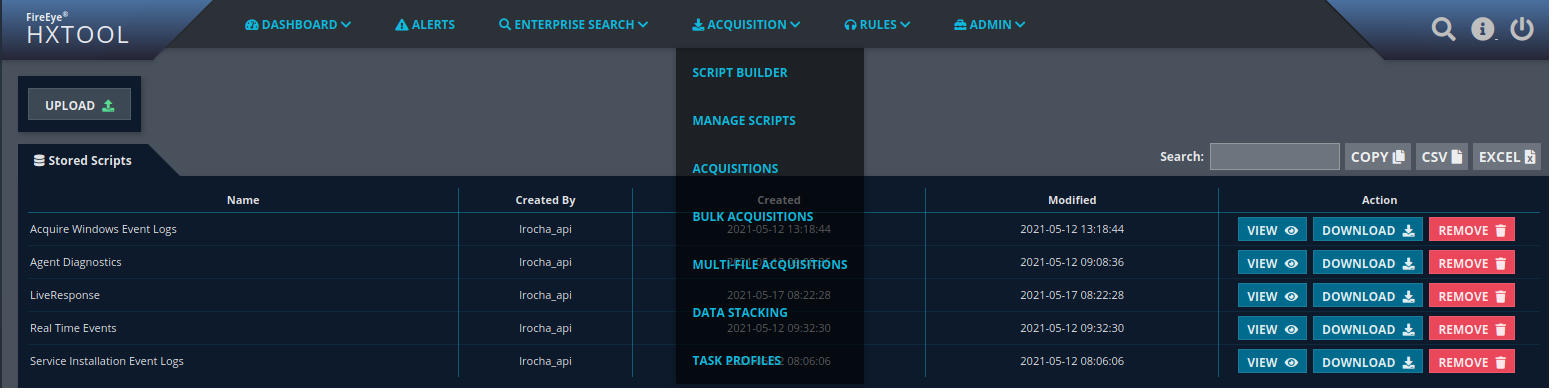
HXTool, originally created by Henrik Olsson in 2016, is a web-based, opensource, standalone tool written in python. that can be used with HX. HXTool provides additional features not directly available in the product GUI by leveraging FireEye Endpoint Security’s rich API. Since the code now is open source, this tool is an excellent example of how you can develop applications utilizing the Endpoint Security REST API. It is available in FireEye’s public GitHub at https://github.com/fireeye/HXTool.

After installation, open a webbrowser and point it to localhost on port 8080. In the HXTool create a new profile with the IP address and port of the HX controller. Then connect with a user that has API Admin rights and was previously created in the HX management interface. There are many features in HX tool but the ability to use Script Builder to create audit scripts allows you fully leverage the potential of HX. After you create a script you run Sweeps using the bulk-acquisition method. The Sweeps can be used to perform enterprise forensics at scale or to look for real time data stored in the ring buffer of the endpoints. Nonetheless, you can use HXTool to perform stack analysis, enterprise searches based on OpenIOC 1.1, create, and maintain the Real-Time indicators, etc.

$ git clone https://github.com/fireeye/HXTool
Cloning into 'HXTool'...
remote: Enumerating objects: 6401, done.
remote: Counting objects: 100% (90/90), done.
remote: Compressing objects: 100% (70/70), done.
remote: Total 6401 (delta 39), reused 55 (delta 20), pack-reused 6311
Receiving objects: 100% (6401/6401), 14.64 MiB | 5.08 MiB/s, done.
Resolving deltas: 100% (4337/4337), done.  
$cd HXTool/   $ pip install -r requirements.txt --user
(..)
Installing collected packages: itsdangerous, MarkupSafe, Jinja2, click, Werkzeug, flask, pycryptodome, tinydb, six, python-dateutil, numpy, pytz, pandas Successfully installed Jinja2-2.11.2 MarkupSafe-1.1.1 Werkzeug-1.0.1 click-7.1.2 flask-1.1.2 itsdangerous-1.1.0 numpy-1.16.6 pandas-0.24.2 pycryptodome-3.9.7 python-dateutil-2.8.1 pytz-2020.1 six-1.15.0 tinydb-3.15.2    
$ python3 hxtool.py
(..)
[2020-06-02 01:39:41,497] {hxtool} {MainThread} INFO - Application starting
[2020-06-02 01:39:41,501] {hxtool} {MainThread} INFO - Application is running. Please point your browser to https://0.0.0.0:8080. Press Ctrl+C/Ctrl+Break to exit.  
* Serving Flask app "hxtool" (lazy loading)  
* Environment: production   
WARNING: This is a development server. Do not use it in a production deployment.    Use a production WSGI server instead.  
* Debug mode: off

Supplementary  IOCs

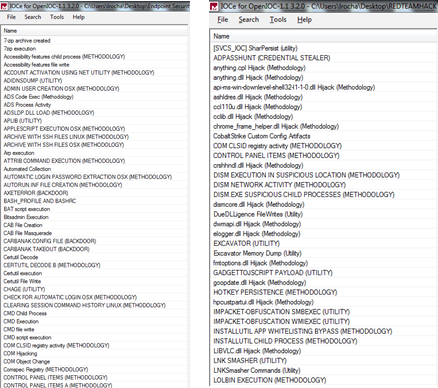
In the FireEye market website, there are a set of FireEye released Real-Time IOCs designed to supplement FireEye Endpoint Security’s production indicators. They were created for environment-specific detection and testing, like tests based on MITRE’s ATT&CK framework. Most of these IOCs will require substantial tuning to use in a production environment. They need to be customized for your environment and should not be uploaded in bulk. This set contains more than 400 IOCs and can be obtained from https://fireeye.market/apps/234563

FireEye Red Team IOCs.  Last December as result of an incident, FireEye released a set of IOCs to detect FireEye Red Team tools. These IOCs empower the community to detect these tools and are available in different formats including OpenIOC, Yara, Snort, and ClamAV. There are more than 80 IOCs in OpenIOC format and can be downloaded from https://github.com/fireeye/red_team_tool_countermeasures

The first set of IOCs are very broad and need to be customized for a particular environment but they offer a starting point for security teams to test and get familiar with the process. The lifecycle of designing, building, deploying, and adopting IOCs is part of the Security monitoring and/or Incident Response capability where well trained and well equipped personnel alongside with consistent and well defined process come into play. If you want to be able to run sophisticated threat hunting missions you first should be able to understand the threat, understand the indicators that help you identify the threat in your network and then you can create and maintain IOCs that may represent that threat. The second set of IOCs are overall very good but some of them need tunning specially the LOLBINs and the suspicious DLL executions.

GOAUDITPARSER

So, by now, with the things that were covered, you have a set of IOCs that you uploaded to HX using the OpenIOC2HXIOC script and you used the HXTool to Sweep your environment to look for threats or you used them to generate Real-Time alerts. But how to analyze the results? Traditionally you likely used the HX GUI or downloaded the data and used Redline. However, we can now use some other technique.  Daniel Pany just recently open sourced GoAuditParser. A versatile and customizable tool to help analysts work with FireEye Endpoint Security product (HX) to extract, parse and timeline XML audit data. People have used Redline to parse and create a timeline of the data acquired with HX but using this tool an analyst may be able to improve his ability to perform analysis on the data at scale obtained via HX. The compiled builds of the tool can be downloaded from https://github.com/fireeye/goauditparser/releases/tag/v1.0.0. Danny has published extensive documentation on how to use the tool on GitHub.

GAP_4_1_4

That’s it for today. If you use HX you can now improve your investigation methods using the mentioned tools. Consider and think about the following 3 steps:

  • Based on leads or alerts you collect Live Response data
    • Use HXTool Script Builder to create a script to acquire Live Response Data
    • Use HXTool to run a Bulk Acquisition to run the acquisitions of Live Response data
    • Download the Live Response Acquisition using HXTool
  • Analyze results & develop timeline
    • Use GoAuditParser to extract, parse and timeline the results.
    • Perform the forensic investigation by interpreting the results
    • Use your favorite tool to create a timeline (likely Excel)
  • Design, build, deploy and adopt Real-Time IOCs and Sweep IOCs
    • Use IOC editor to build IOCs that represent your findings
    • Use IOC editor to create IOCs for both Sweeps and Real-Time
    • Deploy Real-Time IOCs using OpenIOC2HXIOC
    • Create Sweeps with HXTool using Script Builder, Job Filters in conjunction with IOCs to filter results and BulkAcquistions.
  • Repeat

Hopefully this short summary increases the awareness on how to use HX more efficiently. It also serves to capture a perspective on how to use HX because you can use such tools to handle real security incidents and intrusions at enterprise level.

References:

Endpoint Security Server User Guide Release 5.0.2
Endpoint Security Server System Administration Guide Release 5.0.2
IOC Editor 2.2.0.0 User Guide


Tagged , , , , ,

Unleashing YARA – Part 1

[Editor’s Note: In the article below, Ricardo Dias who is a SANS GCFA gold certified and a seasoned security professional demonstrates the usefulness of Yara – the Swiss Army knife for Incident Responders. This way you can get familiar with this versatile tool and develop more proactive and mature response practices against threats. ~Luis]

Intro

yara_logoI remember back in 2011 when I’ve first used YARA. I was working as a security analyst on an incident response (IR) team, doing a lot of intrusion detection, forensics and malware analysis. YARA joined the tool set of the team with the purpose to enhance preliminary malware static analysis of portable executable (PE) files. Details from the PE header, imports and strings derived from the analysis resulted in YARA rules and shared within the team. It was considerably faster to check new malware samples against the rule repository when compared to lookup analysis reports. Back then concepts like the kill chain, indicator of compromise (IOC) and threat intelligence where still at its dawn.

In short YARA is an open-source tool capable of searching for strings inside files (1). The tool features a small but powerful command line scanning engine, written in pure C, optimized for speed. The engine is multi-platform, running on Windows, Linux and MacOS X. The tool also features a Python extension providing access to the engine via python scripts. Last but not least the engine is also capable of scanning running processes. YARA rules resemble C code, generally composed of two sections: the strings definition and a, mandatory, boolean expression (condition). Rules can be expressed as shown:

rule evil_executable
{
    strings:
        $ascii_01 = "mozart.pdb"
        $byte_01  = { 44 65 6d 6f 63 72 61 63 79 }
    condition:
        uint16(0) == 0x5A4D and
        1 of ( $ascii_01, $byte_01 )
}

The lexical simplicity of a rule and its boolean logic makes it a perfect IOC. In fact ever since 2011 the number of security vendors supporting YARA rules is increasing, meaning that the tool is no longer limited to the analyst laptop. It is now featured in malware sandboxes, honey-clients, forensic tools and network security appliances (2). Moreover, with the growing security community adopting YARA format to share IOCs, one can easily foresee a wider adoption of the format in the cyber defence arena.

In the meantime YARA became a feature rich scanner, particularly with the integration of modules. In essence modules enable very fine grained scanning while maintaining the rule readability. For example the PE module, specially crafted for handling Windows executable files, one can create a rule that will match a given PE section name. Similarly, the Hash module allows the creation on hashes (i.e. MD5) based on portions of a file, say for example a section of a PE file.

YARA in the incident response team

So how does exactly a tool like YARA integrate in the incident response team? Perhaps the most obvious answer is to develop and use YARA rules when performing malware static analysis, after all this is when the binary file is dissected, disassembled and understood. This gives you the chance to cross-reference the sample with previous analysis, thus saving time in case of a positive match, and creating new rules with the details extracted from the analysis. While there is nothing wrong with this approach, it is still focused on a very specific stage of the incident response. Moreover, if you don’t perform malware analysis you might end up opting to rule out YARA from your tool set.

Lets look at the SPAM analysis use case. If your team analyses suspicious email messages as part of their IR process, there is great chance for you to stumble across documents featuring malicious macros or websites redirecting to exploit kits. A popular tool to analyse suspicious Microsoft Office documents Tools is olevba.py, part of the oletools package (3), it features YARA when parsing OLE embedded objects in order to identify malware campaigns (read more about it here). When dealing with exploit kits, thug (4), a popular low-interaction honey-client that emulates a web browser, also features YARA for exploit kit family identification. In both cases YARA rule interchanging between the IR teams greatly enhances both triage and analysis of SPAM.

Another use case worth mentioning is forensics. Volatility, a popular memory forensics tool, supports YARA scanning (5) in order to pinpoint suspicious artefacts like processes, files, registry keys or mutexes. Traditionally YARA rules created to parse memory file objects benefit from a wider range of observables when compared to a static file rules, which need to deal with packers and cryptors. On the network forensics counterpart, yaraPcap (6), uses YARA for scan network captures (PCAP) files. Like in the SPAM analysis use case, forensic analysts will be in advantage when using YARA rules to leverage the analysis.

Finally, another noteworthy use case is endpoint scanning. That’s right, YARA scanning at the client computer. Since YARA scanning engine is multi-platform, it poses no problems to use Linux developed signatures on a Windows operating system. The only problem one needs to tackle is on how to distribute the scan engine, pull the rules and push the positive matches to a central location. Hipara, a host intrusion prevention system developed in C, is able to perform YARA file based scans and report results back to a central server (7). Another solution would be to develop an executable python script featuring the YARA module along with REST libraries for pull/push operations. The process have been documented, including conceptual code,  in the SANS paper “Intelligence-Driven Incident Response with YARA” (read it here). This use case stands as the closing of the circle in IOC development, since it enters the realm of live IR, delivering and important advantage in the identification of advanced threats.

Conclusion

The key point lies in the ability for the IR teams to introduce the procedures for YARA rule creation and use. Tier 1 analysts should be instructed on how to use YARA to enhance incident triage, provide rule feedback, concerning false positives, and fine tuning to Tier 2 analyst. Additionally a repository should be created in order to centralize the rules and ensure the use of up-to-date rules. Last but not least teams should also agree on the rule naming scheme, preferably reflecting the taxonomy used for IR. These are some of the key steps for integrating YARA in the IR process, and to prepare teams for the IOC sharing process.

References:

  1. https://github.com/plusvic/yara
  2. https://plusvic.github.io/yara
  3. https://blog.didierstevens.com/2014/12/17/introducing-oledump-py
  4. https://github.com/buffer/thug
  5. https://github.com/volatilityfoundation/volatility
  6. https://github.com/kevthehermit/YaraPcap
  7. https://github.com/jbc22/hipara
Tagged , , ,

Course Review: SANS FOR578 Cyber Threat Intelligence

KillChain

Image retrieved from lockheedmartin.com

Last week I had the opportunity to attend SANS DFIR Prague where I completed the SANS FOR578 course “Cyber Threat Intelligence” (CTI) with Robert M. Lee.  Robert is one of the co-authors of the course and is brilliant instructor that really knows his stuff.  Everything stands or falls with the quality of the instructor and I believe Robert did give us (students) a great learning experience with great interactions and discussions. Among other things Robert is the CEO of the security company Dragos Security and has worked in the US Air Force which allows him to talk genuinely about the “intelligence” topic.

Overall this was a five day course that immerses the student into the new and emerging field of CTI. During the five days we lived, ate and breathed being a CTI analyst. Being a CTI professional is not an easy task and it’s not in five days that you can expect to become one.  However, in my opinion, if someone has the desire, as well as the ability, this course can give you the means. I’m sure this course gave me important skills and competencies about this new, emerging field. One key take away from the training is that it gives you the foundations to create a threat Intel capability into your organization and enables security personnel to develop more proactive and mature response practices against threats and move defenses higher up the kill chain.

The first day is a comprehensive introduction to the new Cyber Threat Intelligence (CTI) domain, with a wide range of topics and terminology being covered. What is threat intelligence? Why should organizations adopt it? What is the value? What is the difference between a consumer and a producer of CTI? What are the different types of CTI?  In addition, background on the intelligence doctrine and its life cycle is also discussed. The afternoon was spent on the different frameworks and models that you can use to create consistent and repeatable CTI outputs. The Kill Chain, Diamond Model, Courses of Action Matrix and the Detection Maturity Model were the ones most covered.

Day two was all about enforcing the models presented in day one with special focus on the Kill Chain model. Lots of exercises supported by a network intrusion scenario where we (students) needed to perform different tasks to put in practice the theory from day one. The way the intrusion attributes, properties and artifacts are mapped to the Kill Chain, Diamond Model and Courses of Action were really useful. Because the frameworks discussed are complementary they can be combined in order to produce multi-dimensional analysis of the intrusion. I think this multi-dimensional approach to intrusions gives great insight about the adversary. Although a time consuming exercise it was great to get a feeling about what a CTI analyst might do in a organization with high security risk that need to have mature and dedicated teams to perform this type of work.

By leveraging the intelligence gained overtime during the analysis of multiple intrusions we start to get an understanding about commonalities and overlapping indicators. Mapping these commonalities and indicators to the intrusion kill chain and diamond model results in a structural way to analyze multiple intrusions. By repeating this process we could characterize intruders activity by determine the tactics, techniques and procedures on how the attackers operate i.e., perform a campaign analysis. This was day three. A meticulous work that is built over time and needs great amount of support from your organization but after execution it will produce great insight about the adversary. In terms of tools, the exercises relied heavily on Excel and the fantastic and open source Maltego.

Day four was focused on the different collection, sharing and ingestion methods of threat intelligence. The primary method of collection discussed was trough threat feeds.  Other collection methods such as OSINT and threat Intel produced inside the organization or received trough circles of trust were also discussed. For sharing, a key take away is that partners with strong non disclosure agreements are very efficient. Still, in the sharing realm delivering context is crucial in order to make it actionable. Furthermore, we discussed the roles of the different ISAC and other organizations.  Regarding the ingestion, the material has very good coverage on the different standards and protocols that have been developed in recent years to collect share and consume technical information in an automated way. The focus was on STIX, TAXII. We also reviewed other methods and standards such as OpenIOC and Yara rules.  In regards to the tools and exercises we had the chance to play with Recorded Future and Threat Connect and and develop OpenIOC and Yara rules. SANS posture overtime has been always vendor neutral but I must say the Recorded Future demo for OSINT is well worth and the tool is really amazing!

The material on day five is more abstract. Special focus on how people – analysts – make conclusions. For example we discussed the difference between observations and interpretations and how to construct assessments. Great amount of material about cognitive biases and how it might influences the work performed by an analyst. During this day we were also exposed to the analysis of competing hypotheses (ACH) methodology by former CIA analyst Richards J Heuer, Jr. The exercises were really interesting because we had to evaluate hypotheses against the evidences we found during the intrusion analysis of the different scenarios.  By the end of the day we immersed into the topic of attribution and discussion about nation state capabilities and the different cases that have been known in the industry.

Of course apart of the training, was great to attend the DFIR Summit, absorb information, play DIFR NetWars and more important meet new people, share experiences and see good old friends!

Tagged , , , , , ,

Dynamic Malware Analysis with REMnux v5 – Part 1

REMnux-logo1 [Part 1 illustrates a series of very useful tools and techniques used for dynamic analysis. Security incident handlers and malware analysts can apply this knowledge to analyze a malware sample in a quick fashion using the multi-purpose REMnux v5. This way you can extract IOCs that might be used to identify the malware across your defense systems and aid your incident response actions. ~Luis]

Malware analysis is a interesting topic nowadays. It requires a fairly broad of knowledge and practical experience across different subjects. My background is in systems and infrastructure which means I am more confident with the dynamic analysis methodology than the static analysis one. Some of the readers have similar background. However, if you are willing to roll your sleeves and spend time in order to learn and be proficient with the different tools and techniques static analysis can done – hopefully will write about basic static analysis in a near future. Additionally is intellectually challenging.

One of the goals of performing malware analysis is to determine the malware actions and get insight into its behavior and inner workings by analyzing its code. By doing this we can find answers to pertinent questions such as:

  • What are the malware capabilities?
  • What is the worst it can do?
  • Which indicators of compromise (IOC) could be used identify this malware in motion (network), at rest (file system) or in use (memory)?  – These IOCs can then be used across our defense systems and in our incident response actions.

The process consists of executing the malware specimen in a safe, secure, isolated and controlled environment.The dynamic analysis methodology allows you to determine the malware behavior and how it interacts with the network, file system, registry and others. In this post I go trough a technique to determine its behaviour at the network level. In this way we can start answering the previous questions.

How?

A simple and effective manner to execute malware analysis in an safe, isolated and controlled fashion would be to use a second hand laptop with enough RAM and fast I/O like a SSD drive. Then on top of it a virtualization software. My personal preferences goes VMware Workstation due to the wide range of operating systems supported, and affordable price. Essentially two virtual machines. One machine running the resourceful and multi-purpose REMnux v5.

For those who don’t know, REMnux is a fantastic toolkit based on Ubuntu created by Lenny Zeltser that provides an enormous amount of tools preinstalled to perform static and dynamic malware analysis. The tools installed have the ability to analyze Windows and Linux malware variants. You can download it from either as a Live CD or a preconfigured virtual appliance for Vmware or VirtualBox from here.

The second machine will be running Windows XP or 7 32 Bits. That will get you started. Then configure the environment and install the required tools on the disposable – relying heavily on VMware snapshots – Windows machine.

In the first technique, I want REMnux to act as gateway, dns server and proxy – including SSL – . This will allow us to intercept all network communications originating from the infected machine. The following picture illustrates the methodology for dynamic analysis.

malware-analysis-framework

The illustration should be self-explanatory. In this manner, any DNS request made by the infected machine will be redirected to the REMnux. If the malware is not using DNS but using hardcoded IP addresses, the requests will go through the default gateway which is pointing to the REMnux. The REMnux by its turn will have iptables configured to redirect all received traffic either on port TCP 80 or 443 to TCP port 8080. On this port – TCP 8080 – Burp Suite is listening as a transparent Proxy. In this way you will have visibility and control into all network communications initiated by the infected machine.

On REMnux the steps to perform this configuration are:

  1. Define the Network adapter settings on VMware Workstation to be in a custom virtual networkg., VMnet5.
  2. Define a static IP
  3. Start FakeDNS to answer any DNS requests.
  4. Start HTTP daemon to answer HTTP requests.
  5. Redirect HTTP and HTTPS traffic to port TCP 8080 by configuring redirect rules via iptables.
  6. Intercept HTTP requests using BURP Suite in Invisible mode on port 8080
  7. Optionally you run tcpdump to capture all the networking traffic (allows you to create IDS signatures).

Te necessary commands to perform steps 3 to 6 are:

remnux@remnux:~$ sudo fakedns 192.168.1.23
dom.query. 60 IN A 192.168.1.23

Open another shell:

remnux@remnux:~$ httpd start
Starting web server: thttpd.
remnux@remnux:~$ sudo sysctl -w net.ipv4.ip_forward=1
net.ipv4.ip_forward = 1
remnux@remnux:~$ sudo iptables -t nat -A PREROUTING -i eth0 -p tcp --dport 80 -j REDIRECT --to-port 8080
remnux@remnux:~$ sudo iptables -t nat -A PREROUTING -i eth0 -p tcp --dport 443 -j REDIRECT --to-port 8080
remnux@remnux:~$ sudo iptables -t nat -L
Chain PREROUTING (policy ACCEPT)
target     prot opt source               destination        
REDIRECT   tcp  --  anywhere             anywhere            tcp dpt:https redir ports 
REDIRECT   tcp  --  anywhere             anywhere            tcp dpt:www redir ports 
REDIRECT   tcp  --  anywhere             anywhere            tcp dpt:https redir ports 

remnux@remnux:~$ burpsuite
[1] 8912

malware-analysis-framework-burp

Then, on Windows the initial steps are:

  1. Define the Network adapter settings in the VMware to be in the same custom virtual network as the REMnux.
  2. Configure IP address in the same range as the REMnux
  3. Configure the DNS server to point to the REMnux
  4. Define the default GW as being the REMnux
  5. Test the network settings
  6. Create a VMware snapshot
  7. Move the malware sample to the machine
  8. Start necessary tools (if needed)
  9. Execute the malware sample

After having the machines ready you can move your malware sample to the disposable Windows machine and execute it. In this case I executed a malware variant of Torrentlocker. The result is shown in the following picture:

malware-analysis-framework-result1

  1. There is a query from the Windows machine to the DNS server asking the A record of the address allwayshappy.ru
  2. FakeDNS answers back with the IP of the REMnux
  3. Windows machines establishes a SSL connection to the IP REMnux on port 443 which is redirected trough iptables to port 8080
  4. The traffic is Intercept by Burp Suite and can be seen and manipulated in clear.
  5. The request can be forwarded to localhost on port 80 to fake an answer.

Following the first request, this malware performs a second request, potentially sending some more data. Unfortunately the request is encrypted – that would be a good challenge for static analysis!

malware-analysis-framework-burp2

As you could see in a quick manner you could determine that the malware tries to reach out to a C&C. This type of knowledge can then be used to find other compromised systems and start your incident response actions.

You might see this as a time-intensive process that does not scale – think a company that needs to analyse hundreds of samples per month, week or per day – solution is automation. Several automated malware analysis system have appeared over the last years such as CWSandbox, Norman Sandbox, Anubis, Cuckoo and others. Essentially these systems load the malicious binary into a virtual machine and execute it. During execution all the interactions with I/O, memory, registry and network are tracked and then a report is produced. This greatly reduces the costs of malware analysis. However, is good to understand how to do manual analysis because many times the malware samples only trigger on specific conditions or bypasses the sandboxes. In addition you start to be proficient on different tools and techniques!


References:
SANS FOR610: Reverse-Engineering Malware: Malware Analysis Tools and Techniques

Tagged , , , , , , , ,

Security Hands-on-Training – Part 1

The information security industry will continue to grow in size, density and specialization (Tipton, 2010). The demand for qualified security professionals who possess relevant knowledge and required skills is growing and will increase substantially (Miller, 2012) (Suby, 2013).  The information security discipline is complex and requires continuous investment in training (Suby, 2013). Recently, various articles posted in the media illustrate demand for security professionals (Ballenstedt, 2012). The Cyber workforce has also increased by 600 percent over the last few years. As an example, a search for the phrase “IT Security” on jobserve.com for IT & Telecommunications industry returned over 5000 jobs in UK. As far as the biggest Swiss job portal jobs.ch is concerned, running the same query resulted in over 300 job postings.

That being said, the following question is being raised: How can one help and facilitate the growth of these information security skills? One key method is via training and education. Even though there are plenty of systematic, formalized security training programs, the hands-on training method provides opportunities to practice skills under the most realistic conditions possible (Sisson, 2001). One option is to  build an environment that is designed to mimic real life situations by creating a simple virtual IT infrastructure lab that will allow simulating complex implementations . This creates an environment that will have the flexibility to accommodate changes by adding and removing components at will. This environment will represent real-world security issues with their respective flaws in an interactive, hands-on experience which comes with greater advantage over traditional learning methods because security issues often require substantial hands-on training in order to be understood and mastered (Erickson, 2008). In addition there is the advantage of being in a controlled environment in which unforeseen events are nonexistent or at least minimized (Gregg, 2008). By creating this environment we foster the knowledge and promote learning. Topics such as incident handling, intrusion analysis, system administration, network security, forensics or penetration testing can be practiced, explored and explained.

In order to maintain focused, we need to define a clear scope while creating such an environment. Each one of the aforementioned security domains would take several book volumes to be adequately covered. The environment is flexible enough to allow simulating any of those domains. In this article series we will focus only on familiarizing users with offensive and hacker techniques, attack methods and exploits – all of which the reader can learn, practice at his or her own pace. We won’t focus on the countermeasures or defensive techniques which can be an opportunity for the reader to conduct further research. For example, an incident handling question could be: how could you better prepare and be able to identify such attack methods? Or how could you contain, eradicate and recover from such attacks? This article series aims to provide an introduction and encourage further research using the same or similar environments.

It is important to realize that some of the techniques that will be demonstrated could be used to commit nefarious acts, and this series of articles only provides them so the reader understands how attack methods work. It is also important to understand that as a security professional, readers should only use these methods in an ethical, professional and legal manner (Skoudis & Liston, 2005) (John & Ken, 2004).

The methodology presented creates an environment that will mimic a small business network which will be modified in order to make its defenses weaker or stronger depending on the offensive tools and techniques the reader wants to practice.  In addition, a combined arms approach is used to raise awareness of how combining different tools and techniques can lead to more powerful attacks. Throughout the series of articles the reader is encouraged to practice other scenarios and further explore the techniques and move into more advanced topics.

Get the Environment Ready

Whether the reader is running Linux, Windows or OS X, a virtual environment can be easily build. There are a variety of virtualization systems and hypervisors available. The VMware Workstation was chosen due to personal preference, wide range of operating systems supported, and affordable price. Other open source and commercial solutions are available and the “thehomeserverblog.com” maintained by Don Fountain contains great articles about them.

Use at least two monitors. The system should be equipped with sufficient RAM and fast I/O like SSD drives or USB 3.0 ports. In most cases an average desktop or laptop can run 2 to 3 machines but a more powerful system with 32GB RAM and enough storage can easily perform with 18 VMs. The first system to be deployed should be a 64 bit host operating system e.g., Windows 7 Professional in order to accommodate enough RAM (Microsoft, 2013). Next the hypervisor software is installed. In this case will be VMware workstation 8. The second component that should be built is a virtual firewall that will be the gateway to the isolated and controlled environment. This is important because the reader does not want to practice tools, exploits and other nefarious software in its home or production network (John & Ken, 2004).

The firewall should have several interfaces mapping to different VMnets which will result in having different networking segments protected by firewall rules and routing. The reader can start with a single-arm DMZ. For a more realistic setup, a DMZ screened subnet approach with a dedicated segment for a management network is preferred. Moving beyond this by adding additional tiers of security is always possible at cost of proportional increase of environment complexity and resources. One of the interfaces of the firewall should be the management interface where the management traffic will reside and where the management systems are.  Another interface of the firewall is considered the external. This interface, in the VMware terminology, is configured as Bridge mode. It will connect the environment to the real-world (host network) where the reader might have his wife’s and kid’s laptop plus the wireless and router devices to be able to connect to the Internet.

The environment used here contains a distributed Checkpoint firewall but any other firewall would work. The reader should choose one that he feels comfortable with or one that he would like to learn about.  The distributed Checkpoint installation is made up of two machines: a firewall module and a management station based on SPLAT version R70. Both machines are managed using a Windows server called GUI, that contains the Smart Console client software.

hotsecurity-fig1

To optimize the install, the DHCP server will be disabled and each VMnet will be mapped to an appropriate network range.

In this environment three (3) DMZ networks were created in the firewall. Each DMZ is assigned an RFC1918 IP network range and will be mapped to a different VMware network. Below figure depicts the network diagram and the high level steps to create the environment are described on the end of this article.

hotsecurity-fig2

In terms of firewall rules the environment contains a very simple approach where HTTP traffic is allowed from anywhere to the Web server. This is a typical scenario in a small business network. Then the internal DNS server is allowed to make UDP connections towards a public DNS server. Another rule allows NTP synchronization between the various machines and a public NTP server. Management traffic that allows communicating with the firewall is defined by default as part of the implicit rules. The initial firewall rule base is shown in the figure below.

hotsecurity-fig3

Below are the high level steps that describe how to create the environment:

  1. Install the host operating system e.g. Windows 7 PRO 64bits.
  2. Install VMware Workstation 8.
  3. Configure VMnets using Virtual Network Editor.
  4. Install and configure the Checkpoint Management Station R70 in VMnet4.
  5. Install Windows OS and Checkpoint Smart Tools in VMnet4.
  6. Install Checkpoint Firewall R70.
  7. Configure the Firewall with 4 interfaces.
  8. Configure routing and define the firewall rules.
  9. Test the connectivity among the different subnets.

Part 2 will follow with windows systems and infrastructure.


References:

Suby, M. (2013). The 2013 (isc)2 global information security workforce study. Retrieved from https://www.isc2cares.org/uploadedFiles/wwwisc2caresorg/Content/2013-ISC2-Global-Information-Security-Workforce-Study.pdf
Skoudis, E., & Liston, T. (2005). Counter hack reloaded: A step-by-step guide to computer attacks and effective defenses, second edition. Prentice Hall..
Gregg, M. (2008). Build your own security lab: A field guide for network testing. John Wiley & Sons.
John, A., & Ken, B. (2004). Creating a secure computer virus laboratory. Manuscript submitted for publication EICAR 2004 Conference, Department of Computer Science, University of Calgary.
Erickson, J. (2008). Hacking: The art of exploitation, 2nd edition. No Starch Press.
Tipton, W. Hord, “Preface” Preface (2010). Official (isc)2 guide to the issap cbk. Auerbach Publications.
Miller, J. (2012, 10 31). Napolitano wants nsa-like hiring authority for dhs cyber workforce. Retrieved from http://www.federalnewsradio.com/473/3101703/Napolitano-wants-NSA-like-hiring-authority-for-DHS-cyber-workforce
Ballenstedt, B. (2012, 08 12). Dhs seeks cyber fellows. Retrieved from http://www.nextgov.com/cio-briefing/wired-workplace/2012/11/dhs-seeks-cyber-fellows/59197/?oref=ng-voicestop

Tagged , , , , , ,

Intelligence driven Incident Response

killchainBack in March 2011, Eric Hutchins, Michael Cloppert and Dr. Rohan Amin from Lockheed Martin (US Gov defense contractor) released a paper named Intelligence Driven Computer Network Defense Informed by Analysis of Adversary Campaigns and Intrusion Kill Chains. This was a great contribution to the IT security community because it describes a novel way to deal with intrusions. They claim that current tools and models that deal with intrusions need to evolve mainly due to two things. First network defense tools focus on the vulnerability component of the risk instead of the threat. Second the traditional way of doing incident response happens after a successful intrusion.  To solve this problem they propose a model that leverages an understanding about the tools and techniques used by the attackers creating intelligence that is then used to decrease the likelihood success of an intrusion.  In order to understanding the threat actors , their tools and techniques they adopted models and terms that have origins in the US military. Essentially they propose to maps the steps taken by attackers during an intrusion. These steps are then intersected with a chain of events with the goal to detect, mitigate and respond to intrusions based on the knowledge of the threat using indicators, patterns and behaviors that are conducted during the course of action of the intrusion.

To map the attackers activity the authors propose an intelligence gathering element called indicator that is divided in three types:

  • Atomic – Atomic indicators are attributes relevant in the context of the intrusion and cannot be further divided into smaller parts. Examples include IP addresses, email addresses, DNS names.
  • Computed – Computed indicators are digital representation of data pertinent to the intrusion or patterns indentified with regular expressions. Examples include hashes from malicious files,  regular expressions used on IDS.
  • Behavioral – Behavioral indicators are a combination of atomic and computed indicators trough some kind of logic that outline a summary of the attackers tools and techniques. An example is well described by Mike Cloppert: “Bad guy 1 likes to use IP addresses in West Hackistan to relay email through East Hackistan and target our sales folks with trojaned word documents that discuss our upcoming benefits enrollment, which drops backdoors that communicate to A.B.C.D.’ Here we see a combination of computed indicators (Geolocation of IP addresses, MS Word attachments determined by magic number, base64 encoded in email attachments) , behaviors (targets sales force), and atomic indicators (A.B.C.D C2)”

The phases to map the attacker activity are based on US DoD information operations doctrine with its origins in the field manual 100-6 from the Department of the Army. This systematic process evolved over the years and is also described in the Air Force Doctrine Document 2-1.9 8 June 2006 as kill chain and referred in military language as dynamic targeting process F2T2EA (Find, Fix, Track, Target, Engage, and Assess) or F3EAD (Find, Fix, Finish, Exploit, Analyze and Disseminate). The authors expanded this concept and presented a new kill chain model to deal with intrusions. The 7 phases of the cyber kill chain are:

  • Reconnaissance : Research, identification and selection of targets, often represented as crawling Internet websites such as conference proceedings and mailing lists for email addresses, social relationships, or information on specific technologies.
  •  Weaponization : Coupling a remote access trojan with an exploit into a deliverable payload, typically by means of an automated tool (weaponizer). Increasingly, client applications data files such as Adobe PDF or Microsoft Office documents serve as the weaponized deliverable.
  •  Delivery : Transmission of the weapon to the targeted environment using vectors like email attachments, websites, and USB removable media.
  •  Exploitation : After the weapon is delivered to victim host, exploitation triggers intruders’ code. Most often, exploitation targets an application or operating system vulnerability, but it could also more simple exploit the users themselves or leverage an operating system feature that auto-executes.
  •  Installation : Installation of a remote access trojan or backdoor on the victim system allows the adversary to maintain persistence inside the environment.
  •  Command and Control (C2) : Typically, compromised hosts must beacon outbound to an Internet controller server to establish a C2 channel.
  •  Actions on Objectives : Only now, after progressing through the first six phases, can intruders take actions to achieve their original objectives. Typically this objective is data exfiltration which involves collecting, encrypting and extracting information from the victim environment. Alternatively, the intruders may only desire access to the initial victim box for use as a hop point to compromise additional systems and move laterally inside the network.

Then these steps are used to produce a course of action matrix that is modeled against a system that is used, once again, in military language as offensive information operations with the aim to  detect, deny, disrupt, degrade, deceive and destroy. The goal is to create a plan that degrades the attacker ability to perform his steps and forcing him to be reactive by interfering with the chain of events. This will slow the attackers movements, disrupt their decision cycles and will increase the costs to be successful.  The following picture taken from the original paper illustrates the course of action matrix.

courseofaction


This model is a novel way to deal with intrusions by moving from the traditional reactive way to a more proactive system based on intelligence gathered trough indicators that are observed trough out the phases. Normally the incident response process starts after the exploit phase putting defenders in a disadvantage position. With this method defenders should be able to move their actions and analysis up to the kill chain and interfere with the attackers actions. The authors  go even further to a more strategic level by stating that intruders reuse tools and infrastructure and they can be profiled based on the indicators. By leveraging this intelligence defenders can analyze and map multiple intrusion kill chains over time and understanding commonalties and overlapping indicators. This will result in a structural way to analyze intrusions. By repeating this process one can characterize intruders activity by determine the tactics, techniques and procedures on how the attackers operate i.e., perform a campaign analysis.

References and Further reading:

Mike Cloppert series of posts on security intelligence on the SANS Forensics Blog

Lockheed Martin Cyber Kill Chain

Sean Mason from GE on Incident Response

Tagged , , ,

Evidence acquisition – Creating a forensic image

helix-shotFollowing the identification phase of the incident handling process, where among others you have identified malicious acts or deviations from the normal operation. It comes the containment phase.  During the containment phase you want to stop the damage. Stop the bleeding and pause the attacker in the most quick and effective manner without changing evidence and using a low profile approach. There isn’t a silver bullet on how to do containment because every case is unique however there are some strategies that you can use. Some examples of short term containment include disconnecting the network cable, redirecting the impacted system DNS name to another IP address, creating a firewall rule or if your infrastructure allows put the system into a separated isolated vlan. During this process engage the business owners and decide the best approach.  Do not gracefully shutdown the system because it will destroy important evidence, artifacts and you will lose all your volatile data.

There are times that the incident handler is also gathering evidence to deliver to the forensics team or the incident handler also does the forensics analysis. Depending on the case you might be working, you might see an overlap between incident handling and forensics but the processes and procedures go hand in hand. From a forensics perspective do a forensics image of the affected system. This means gathering the file system using a disk imaging process and a memory dump (volatile data).  You should start by gathering the volatile data, then you do a disk image. With these elements you can do a thoroughly analysis of the data. During the forensics data analysis, among other things, you will look at the file system at bit level, analyzing several artifacts such as program execution, files download,  file opening and creation, usb and drive usage, account usage, browser usage, etc.

Create a forensic image of the disk as soon as is practical. Make sure you use blank media in a pristine state to create a copy of the impacted system. This blank media e.g, usb hard drive, should be wiped. You clean and prepare the drive during the preparation phase. You do not want to be wiping drives while going under fire!  To do the disk image you should do a bit-by-bit image using your preferred toolkit. Don’t use the tools from the compromised system because you cannot trust them.  Use binaries from a another source. One example is the linux based toolkit Helix that brings the dd tool built in that will assist you doing the forensic image of the hard drive – Helix product went commercial but you can still download the free 2009R3 version – .  Once you created the image and ensure its integrity, is good practice to record the time and the evidence creation method including the image hash on your incident handler notebook. If times allow create more than one image. Most of the times you don’t have time because a image creation can take several hours to execute. In such case you do a duplicate offsite and then you do your analysis using the duplicate. Image creation is a simple task but you need to practice it.

To do the image creation of the hard drives the traditional way is to remove the hard drive from the impacted system and create a forensic image using a write block. But other times this method is not practical. Another way of making a forensic image of the hard drive is to use live acquisition methods, boot disk acquisition or using remote/enterprise grade tools.  A live system acquisition might be useful in cases the affected drive is encrypted or you have a RAID across multiple drives or is not feasible to power down the machine. However, this method will only grab the logical part of the hard drive i.e. partitions such as FAT, NTFS, EXT2, etc.

The other method is using a bootable forensic distro such as Helix. You need to reboot the system and boot the system using CD/USB. This allows to create a bit-by-bit image of the physical drive, the evidence on the drive is not altered during boot process and you can create an image of the hard drive into a image file. This image file can then be used across different analysis tools and is easier to backup.

Let’s look at an hands-on scenario to create a forensic image using a bootable disk method from a compromised or suspicious system using dd. Dd is simple and flexible tool that is launched using the command line and is available for Windows and Linux. In this case we will run dd in a Linux system. What dd does is only copying chunks of raw data from one input source to an output destination. It does not know nothing about partitions or file systems. dd reads from its input source into blocks (512 bytes of data by default) specified by the if= suffix. It then writes the data to an output destination using the of= suffix.

We start by using dd to prepare a target hard drive. We will wipe the data of an hard drive that we will be using to gather the evidence. We will use dd to zeroize an 320Gb USB drive. This will render the drive sterile and into a pristine state. Plug the USB drive into a Linux system and execute fdisk -lu to display available drives on the system. In this case we have 2 drives. One is the /dev/sda which is the internal hard drive of the system and the /dev/sdb which is the 320Gb drive that we plugged into the system. The /dev/sdb does not contain any valid partitions and this is ok for now because we only want to wipe it.

root@ubuntu:~# fdisk -lu
Disk /dev/sda: 160.0 GB, 160041885696 bytes
255 heads, 63 sectors/track, 19457 cylinders, total 312581808 sectors
Units = sectors of 1 * 512 = 512 bytes
Disk identifier: 0x0006784f
   Device Boot      Start         End      Blocks   Id  System
/dev/sda1   *        2048      206847      102400    7  HPFS/NTFS
Partition 1 does not end on cylinder boundary.
/dev/sda2          206848   312578047   156185600    7  HPFS/NTFS
 
Disk /dev/sdb: 320.0 GB, 320072933376 bytes
255 heads, 63 sectors/track, 38913 cylinders, total 625142448 sectors
Units = sectors of 1 * 512 = 512 bytes
Disk identifier: 0x00000000
Disk /dev/sdb doesn't contain a valid partition table

Next execute dd specifying as input the special file /dev/zero and the /dev/sdb as the output drive by using a block size of 8k to increase the speed of the process. This will create zeros across the entire drive. Be careful with this command and make sure you are wiping the right drive. On our system this process took more than 3 hours to complete.

root@ubuntu:~# dd if=/dev/zero of=/dev/sdb bs=8k
dd: writing `/dev/sdb': No space left on device
39071404+0 records in
39071403+0 records out
320072933376 bytes (320 GB) copied, 11579.9 s, 27.6 MB/s


The “No space left on device” error is normal. Also note that the number of records in and out multiplied by the block size (8192) will get you the number of bytes copied.

To confirm that the drive has been zeroized you can dump the contents using xxd.

root@ubuntu:~# cat /dev/sdb | xxd | more
0000000: 0000 0000 0000 0000 0000 0000 0000 0000  ................
0000010: 0000 0000 0000 0000 0000 0000 0000 0000  ................
0000020: 0000 0000 0000 0000 0000 0000 0000 0000  ................
0000030: 0000 0000 0000 0000 0000 0000 0000 0000  ................
0000040: 0000 0000 0000 0000 0000 0000 0000 0000  ................


We have now prepared our media for the acquisition process. Now that we have pristine media we can do our forensic image. Boot the Helix CD on the target/compromised system and  plug the USB media. Then create a EXT2 file system using fdisk and mke2fs.

root@ubuntu:~# fdisk /dev/sdb
Device contains neither a valid DOS partition table, nor Sun, SGI or OSF disklabel
Building a new DOS disklabel with disk identifier 0x7b441f7a.
Changes will remain in memory only, until you decide to write them.
After that, of course, the previous content won't be recoverable.
The number of cylinders for this disk is set to 38913.
There is nothing wrong with that, but this is larger than 1024,
and could in certain setups cause problems with:
1) software that runs at boot time (e.g., old versions of LILO)
2) booting and partitioning software from other OSs
   (e.g., DOS FDISK, OS/2 FDISK)
Warning: invalid flag 0x0000 of partition table 4 will be corrected by w(rite)
Command (m for help): m
Command action
   a   toggle a bootable flag
   b   edit bsd disklabel
   c   toggle the dos compatibility flag
   d   delete a partition
   l   list known partition types
   m   print this menu
   n   add a new partition
   o   create a new empty DOS partition table
   p   print the partition table
   q   quit without saving changes
   s   create a new empty Sun disklabel
   t   change a partition's system id
   u   change display/entry units
   v   verify the partition table
   w   write table to disk and exit
   x   extra functionality (experts only) 
Command (m for help): p
Disk /dev/sdb: 320.0 GB, 320072933376 bytes
255 heads, 63 sectors/track, 38913 cylinders
Units = cylinders of 16065 * 512 = 8225280 bytes
Disk identifier: 0x7b441f7a
   Device Boot      Start         End      Blocks   Id  System
Command (m for help): n
Command action
   e   extended
   p   primary partition (1-4) p
 
Partition number (1-4): 1
First cylinder (1-38913, default 1):
Using default value 1
Last cylinder or +size or +sizeM or +sizeK (1-38913, default 38913):
Using default value 38913
Command (m for help): w
The partition table has been altered!
Calling ioctl() to re-read partition table.
Syncing disks.
 
root@ubuntu:~# mke2fs /dev/sdb1
 
mke2fs 1.40.8 (13-Mar-2008)
Filesystem label=
OS type: Linux
Block size=4096 (log=2)
Fragment size=4096 (log=2)
19537920 inodes, 78142160 blocks
3907108 blocks (5.00%) reserved for the super user
First data block=0
Maximum filesystem blocks=0
2385 block groups
32768 blocks per group, 32768 fragments per group
8192 inodes per group
Superblock backups stored on blocks:
       32768, 98304, 163840, 229376, 294912, 819200, 884736, 1605632, 2654208,
       4096000, 7962624, 11239424, 20480000, 23887872, 71663616
Writing inode tables: done                           
Writing superblocks and filesystem accounting information: done
This filesystem will be automatically checked every 25 mounts or
180 days, whichever comes first.  Use tune2fs -c or -i to override.
 
root@ubuntu:~# fdisk -lu
 
Disk /dev/sda: 160.0 GB, 160041885696 bytes
255 heads, 63 sectors/track, 19457 cylinders, total 312581808 sectors
Units = sectors of 1 * 512 = 512 bytes
Disk identifier: 0x0006784f
   Device Boot      Start         End      Blocks   Id  System
/dev/sda1   *        2048      206847      102400    7  HPFS/NTFS
Partition 1 does not end on cylinder boundary.
/dev/sda2          206848   312578047   156185600    7  HPFS/NTFS
 
Disk /dev/sdb: 320.0 GB, 320072933376 bytes
255 heads, 63 sectors/track, 38913 cylinders, total 625142448 sectors
Units = sectors of 1 * 512 = 512 bytes
Disk identifier: 0x7b441f7a
   Device Boot      Start         End      Blocks   Id  System
/dev/sdb1              63   625137344   312568641   83  Linux


The fdisk created a partition that used the entire disk and the mk2fs created the file system (note the command run on /dev/sdb1). Finally with the fdisk -lu you could confirm that the partition was formated using with an EXT2. The next step is mount the file system by creating a mount point and then mounting the partition.

root@ubuntu:~# mkdir /mnt/target
root@ubuntu:~# mount /dev/sdb1 /mnt/target

Then we are ready to start our bit-by-bit image creation. This method will gather the allocated space, unallocated space and slack space, bad blocks. This means will grab the all the sectors from the hard drive from the MBR to the final sector including the Host Protected Area (HPA) if it exists.

Start by creating a cryptographic fingerprint of the original disk using MD5. This will be used to verify the integrity of the duplicate. Then using dd with the input source being the /dev/sda and the output file a file named suspect.img. Other usefull options is the conv=sync,noerror to avoid stopping the image creation when founding an unreadable sector. If such sector is found with this option, it will skip over the unreadable section (noerror) and pad the output (sync). Finally create the fingerprint of the image created and verify that both fingerprints match and unmount the drive.

root@ubuntu:~# md5sum /dev/sda > /mnt/target/suspect.md5
root@ubuntu:~#dd if=/dev/sda of=/mnt/target/suspect.img conv=sync,noerror bs=8k
19536363+0 records in
19536363+0 records out
160041885696 bytes (160 GB) copied, 5669.92 s, 28.2 MB/s
root@ubuntu:~#md5sum /mnt/target/suspect.img > /mnt/target/suspect.img.md5
root@ubuntu:~# cat /mnt/target/*.md5
6a5346b9425925ed230e32c9a0b510f7  /mnt/target/suspect.img
6a5346b9425925ed230e32c9a0b510f7  /dev/sda
root@ubuntu:~# umount /mnt/target/

The creation of the image is a simple process but you should practice it. Under fire is much harder to accomplish these type of activity.  Also it is a process that can take several hours to accomplish. In our case took around 90m. The integrity checking took around the same time.  With these steps we created a forensically sound image of an hard drive in a bit-by-bit manner and we ensured its integrity.

Now that we collected a forensic image we could start our forensics investigation by doing an in-depth analysis of the file system and analyzing several artifacts such as program execution, files download,  file opening and creation, usb and drive usage, account usage, browser usage, etc.  To do this we could use the SANS Investigative Forensic Toolkit (SIFT) and start practicing tools and techniques to discover evidence and tracks about the suspect. During our investigation we might want to gather data to answer questions such as:

How did the attacker gain entry?
What is the latest evidence of attacker activity?
What actions did the attacker execute on the system?
How did the attacker maintained access to the environment?
What tools has the attacker deployed?
What accounts did the attacker compromise?


References:

SANS Forensics 508 – Advanced Computer Forensic Analysis and Incident Response

Tagged , , ,