
[The first part of this article described the steps needed to do a live memory acquisition of a potentially compromised system using a free tool called Redline – version 1.11.1 -. In this case the system was my wife’s computer which had been complaining about the slowness of her system for quite some time. With the memory image done, I could start a full investigation with Redline and look for known threats hits against IOCs. ~Luis]
Back in February 2013, Mandiant released a unique report called APT1, Exposing One of China’s Cyber Espionage Units. This report is a must read for everyone in the security industry. It exposed detailed evidence about a cyber espionage campaign that has been claimed to be carried out by the Chinese government. The report is full of details, very well written and contains massive tactical intelligence. In two weeks following its release it generated a lot of comments and research. One important aspect of this report was that Mandiant released a separate appendix which contains huge number of indicators such as domain names, IP addresses, SSL certificates and MD5 hashes. The appendix can be downloaded here. The appendix C – The Malware Arsenal contains full details about the discovered malware capabilities including description, registry keys, mutex names, C&C addresses and others in a very structural fashion. The appendix G – IOCs contains the indicators of compromise in OpenIOC format that can be imported into Redline to find Evil.

Basically, what I did was to import those digital artifacts in OpenIOC format into Redline and then analyze the memory image to find matches.
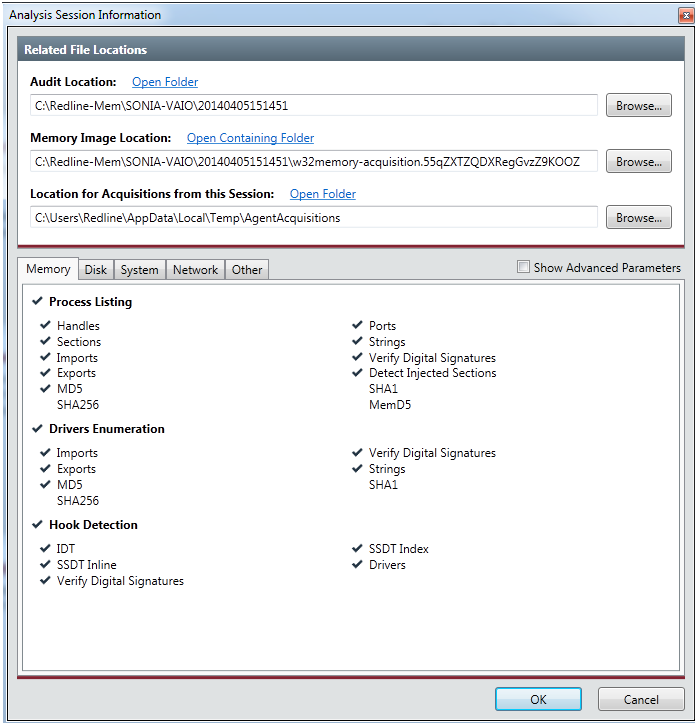
First, I opened the Redline tool and selected to open a recent analysis session – which was done in part I -. Then clicked on the top left M button and selected Session information.

The Analysis Session Information box appeared. In the Memory Image Location, I browsed into the collected data folder and selected the memory image. The file should be in the folder where the data was collected and it starts with the name w32memory-aquisition.xxx. This will allows us to acquire memory address space of processes and drivers. With this feature we can dump malicious processes or driver from memory into a file. Then we could eventually disassemble it to further determine its capabilities. Clicked ok to finish.
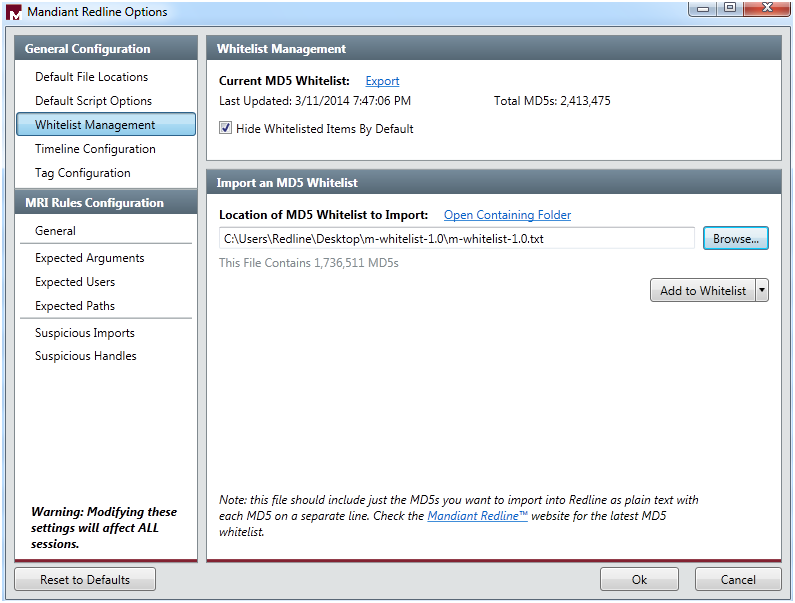
Next, I went to Mandiant Redline Options trough the M button. Here I selected the Whitelist Management and imported a MD5 Whitelist provided by Mandiant. This extra list is a set of hashes from common (known good) executable files to filter out some of the memory analysis entries. Includes known good DLL’s and executable hashes from Microsoft Windows Server Update Service and National Software Reference Library and can be downloaded here. Then clicked Add to Whitelist to append this hashes to the existing ones. Next clicked Hide Whitelisted Items by Default and clicked ok. This allows me to hide a great number of known good information because the tool does not display any file with an MD5 hash value in the whitelist.
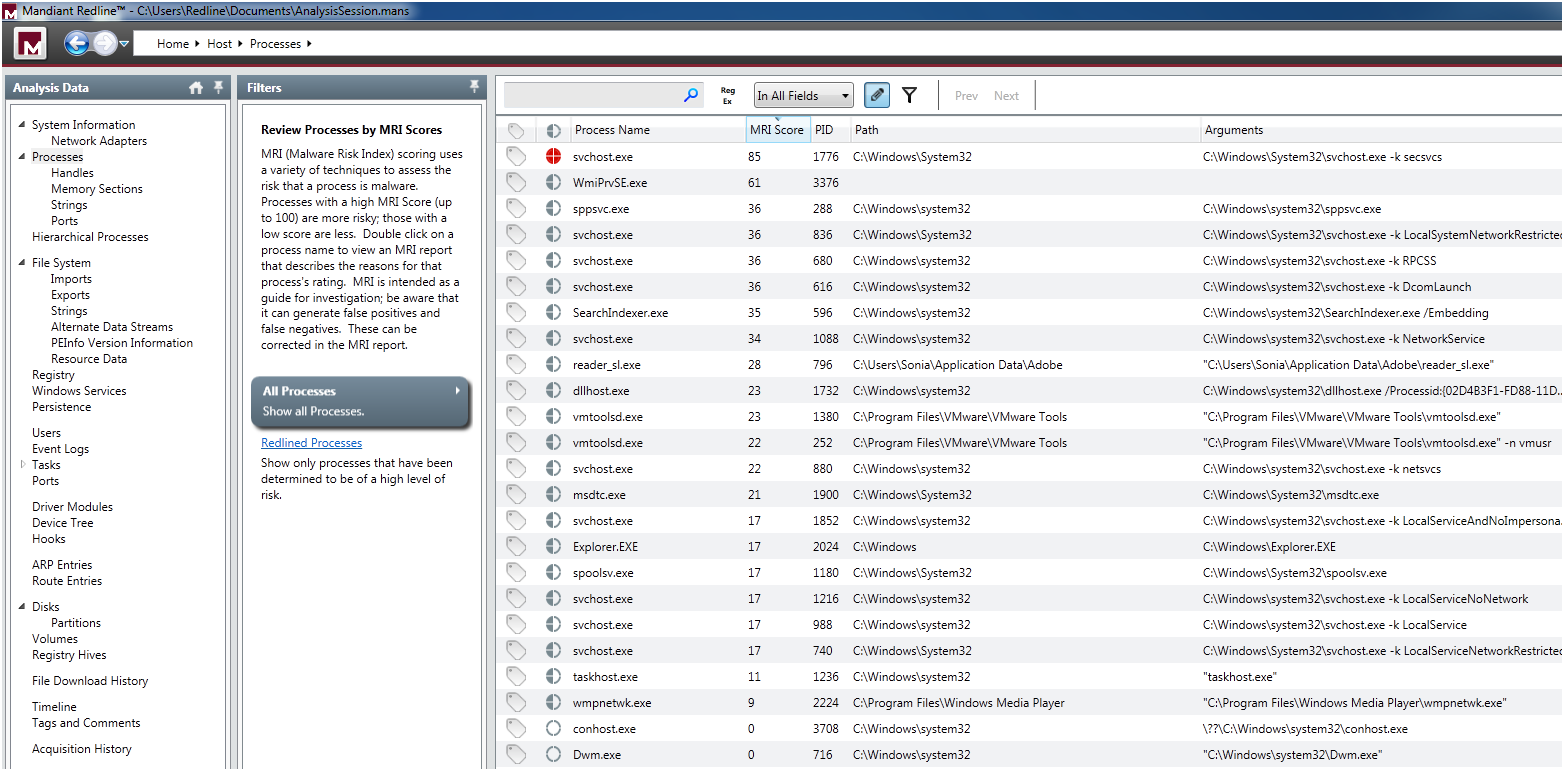
After that, in the Start your Investigation page – this is the home page of your analysis and contain different steps suggested by the tool to assist you in the investigation – I selected I am Reviewing a Full Live Response or Memory Image and clicked in Investigate. This took me to the navigation page where I could apply a set of filters to do a in depth analysis of the system. The tool automatically groups data by types, such as processes or users, and creates views to help you spot potential areas of compromise. First thing that called my attention was in the Processes filter where the svchost.exe was redlined with a malware risk index (MRI) score of 85. The MRI score allows me to prioritize the investigation. Higher the score more likely this process is involved in a potential compromisse.
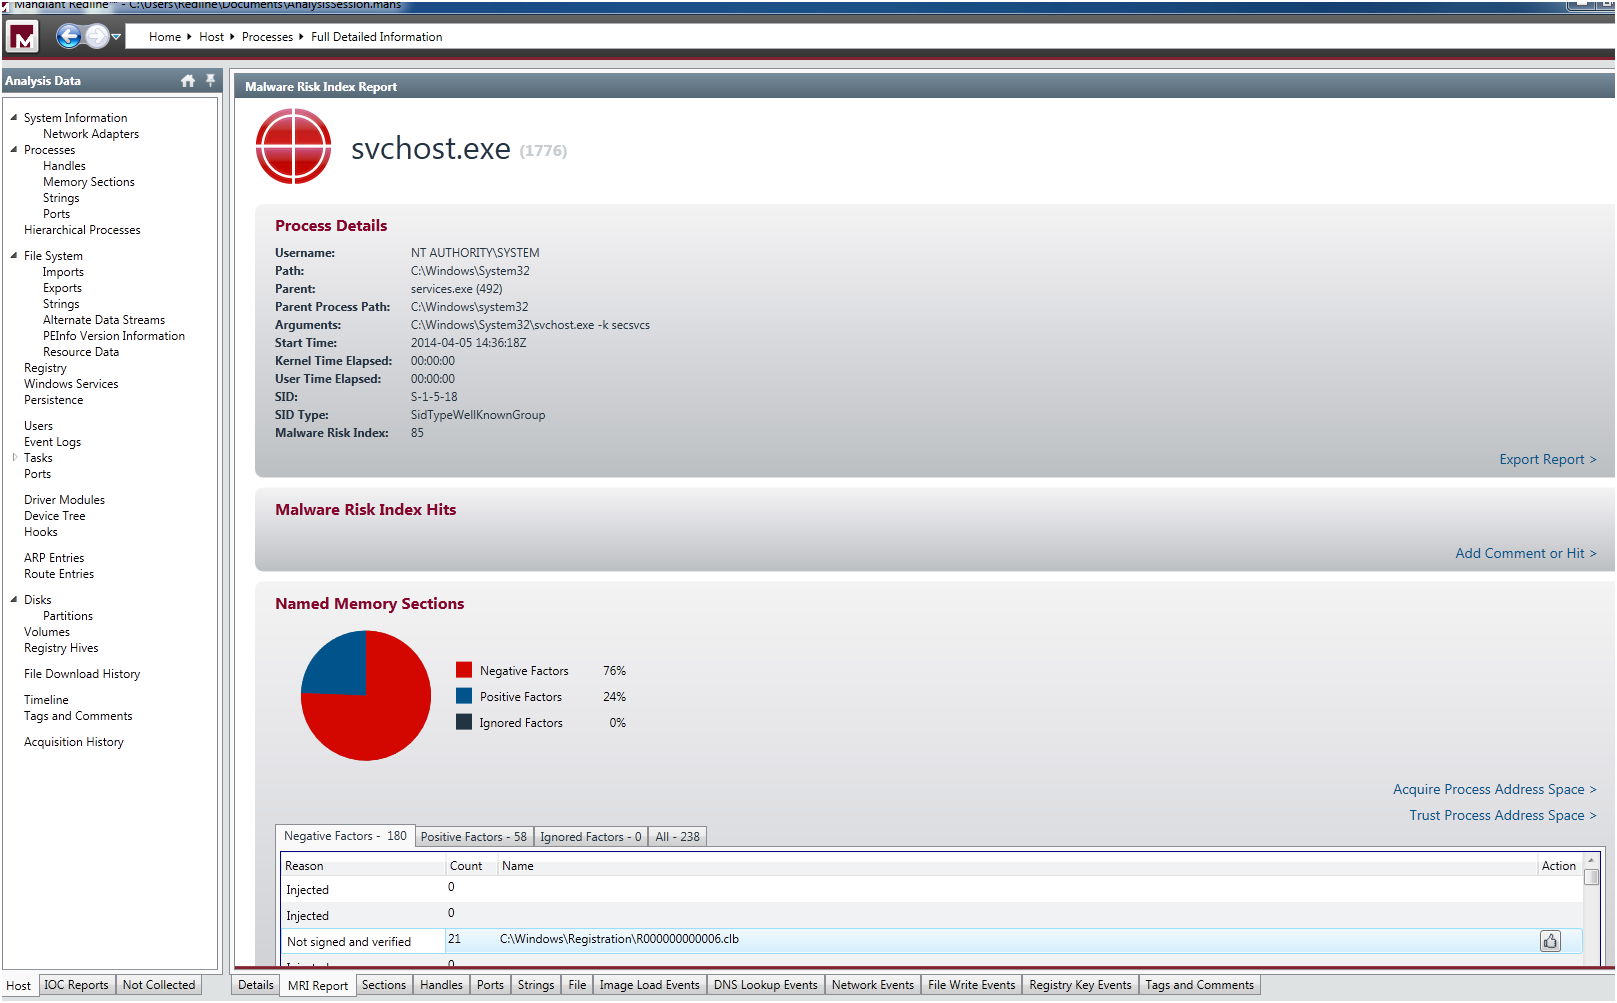
I double clicked in the process and it took me to the detailed information page. Then I select the MRI Report tab at the bottom of the window. Here I could see the reasons that contributed to the high MRI score, a pie graph and various tables of risk factors . One relevant aspect was that it contained a big number of injected memory sections.
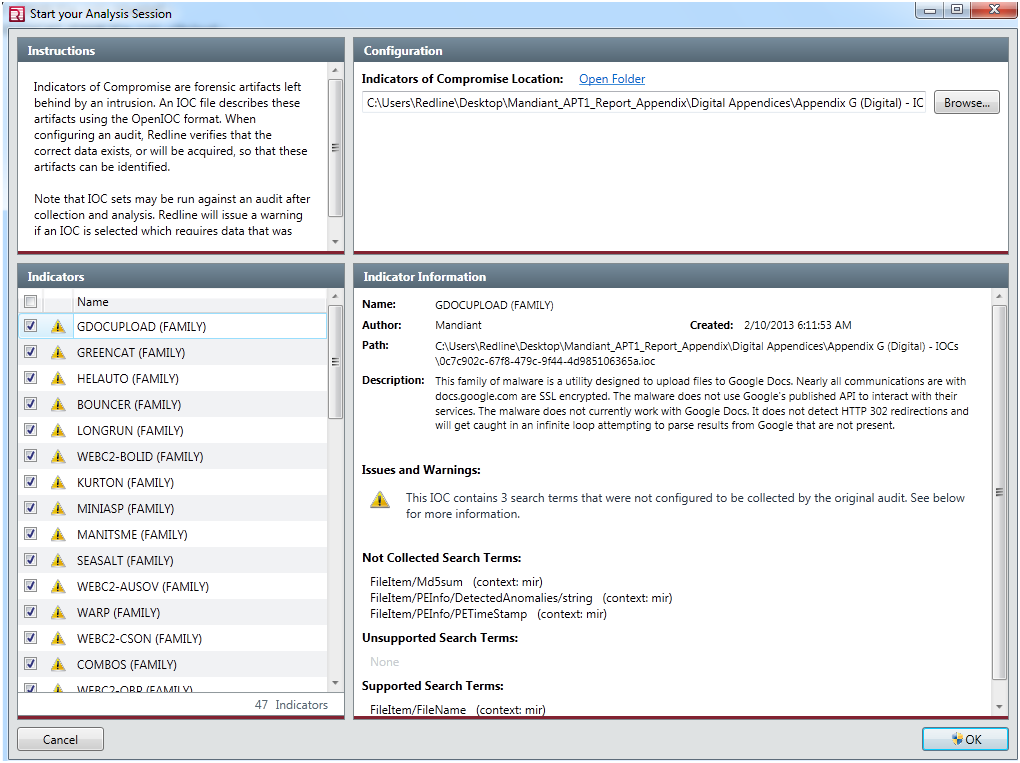
Next, without losing anymore time I went to the IOC reports section and clicked on Create a new IOC report. The Start you Analysis section appeared. Here I selected the folder in which the IOC files were located which was the folder where I extracted the APT1 appendix report. A huge list of indicators were loaded. I could review them, enable and disable each IOC by checking it. The warnings indicates that Redline will evaluate the IOC, but it may falsely indicate there were no hits (a false negative) due to a lack of collected data or unknown terms.
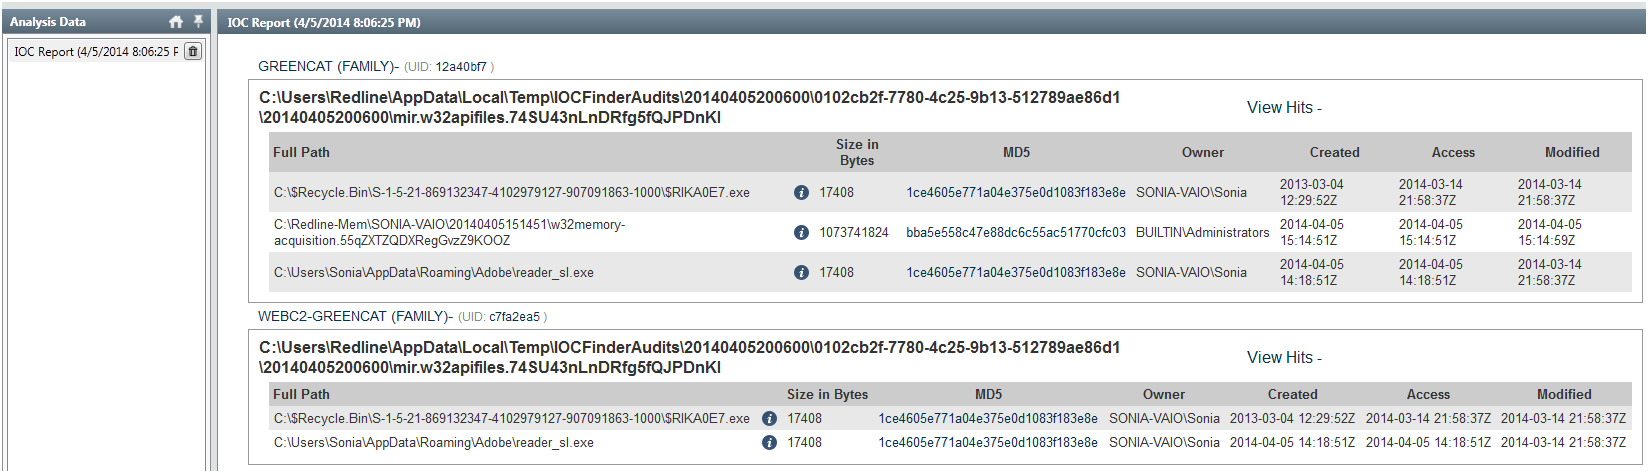
Then the data was evaluated and executed in the background. It took around 30m to finish. When the analysis was done I could browse the IOC report. In the report I could see details about the IOC, such as definition and author. Hits associated with each file that corresponds to an IOC. Detailed information about each hit and the number of indicators that generated hits. In this case the IOC characteristics of the GREENCAT and WEBC2-GREENCAT malware family matched the characteristics observed in the system!
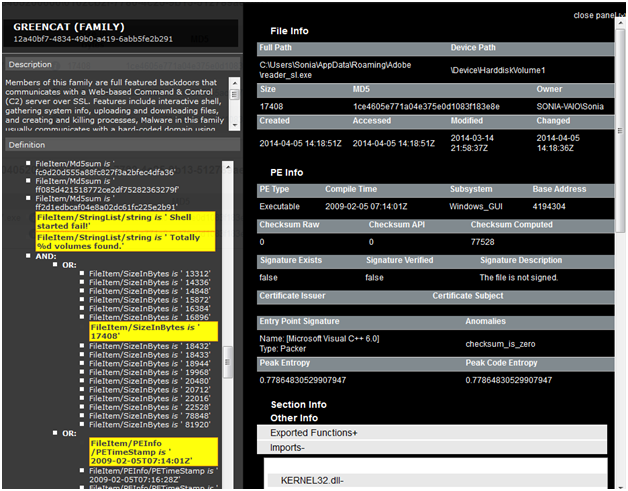
GREENCAT family was one of the malware profiled in the APT1 campaign and is described in the appendix C – The Malware Arsenal . Basically is a backdoor that communicates with a C&C server and includes a variety of features such as gathering info about the system or creating a shell. When clicking in the details section I could see full hit details such as the file and PE info. In the PE Info I could get further details on PE Sections, Exported and Imported functions and strings.
As you could see is extremely easy and accessible to everyone to do a memory analysis on a potential compromised system and use IOCs to find known Evil. The tools are getting better, more sophisticated and automated. With this type of tools I even get the feeling that I could do memory forensics and hunting malware!
Additionally, In the resources section of the OpenIOC site you can find IOCs for malware including Zeus, Stuxnet, Duqu and others. You could then import them into Redline and scan your systems. You never know if someone might have implanted a Stuxnet variant on your home systems to compromise your wife’s nuclear centrifuge ; ).
As possible next steps, I might get a copy of the malware sample by dumping it from memory or get the binary itself. Then take it to my malware analysis lab and determine its capabilities. Using behavioral and code analysis techniques combined with the assistance of tools available on REMnux you analyse it in a controlled environment. From an incident response perspective, I will now proceed with the containment phase. I will notify my wife about what happened and I will take her system offline in order to stop the damage and prevent the attacker from getting further. I will then go through the eradication, recovery and lessons learned phase.
References:
Redline User Guide

Excellent. Thank you.
LikeLike